https://www.iperiusbackup.com/cms/iperius-backup-tutorials.aspx
Microsoft Exchange is one of the most widely used email servers in the world for centralised management of messaging by e-mail within a corporate network.
In addition to this feature, which enables online collaboration among different users in an organisation (enterprise, institution, etc.), it allows the management of calendars and address books, which can then be shared without using additional applications.
The Advanced Exchange version of Iperius Backup allows you to perform different types of backup and restore your Microsoft Exchange server (and Exchange Online on Office 365), in order to meet all the needs and allows you to keep your mailbox safe by performing regular backups, and then restoring them in case of problems.
With this new feature, Iperius allows a granular type (.pst file backup applicable to individual mailboxes or groups of them, to cover all mailboxes on the server) and total type (hot backup of unique block level image type in VSS Full mode, with truncation of logs, VSS Copy, without any truncation) backup.
In addition, Iperius allows easy and instant recovery of files obtained from your backup, implementing restore functions ranging from granular (restoring individual .pst files on any mailbox server) to the general (multiple recovery mailboxes based on the .pst file folders created from previous backups) restoration.
Our software is compatible with all versions of Exchange Server 2010 SP1 by up to 2016, as only requirements for installing .NET Framework 4.5 and Windows Management Framework 4.0 or higher, and enabling one to execute backup and restore not only from the centre where Exchange Server is installed, but also from any terminal belonging to the domain.
By buying a single license and installing you can perform backup and restore unlimited Microsoft Exchange server mailboxes, enjoying free access to all future updates, as well as our phone support and email.
We will now see how to make a backup of .pst files to one or more Microsoft Exchange mailboxes.
NB: Before making a backup through Iperius, make sure you have followed our tutorial to configure all the permissions needed to perform the operation:
https://www.iperiusbackup.net/en/configure-exchange-permissions-backup-export-restore-mailboxes/
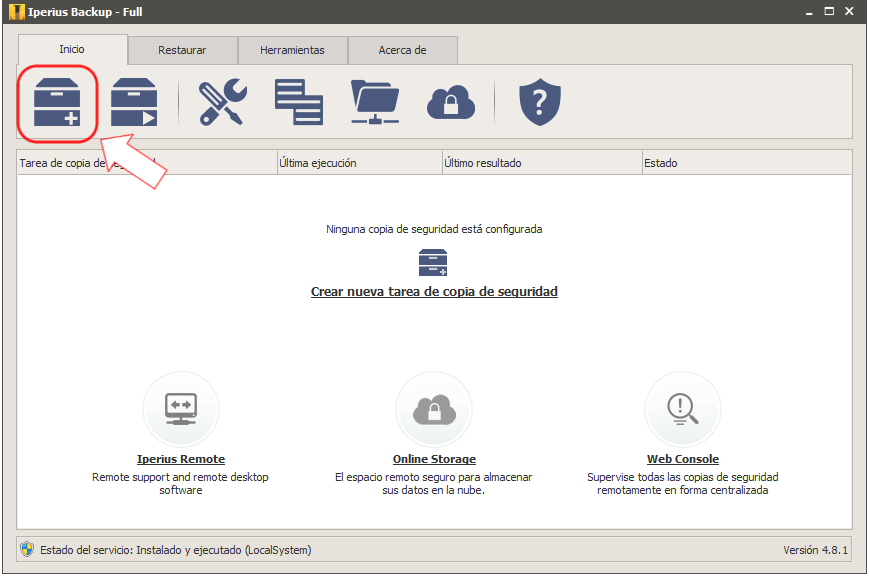
From the main window of the program, we create a new backup operation:
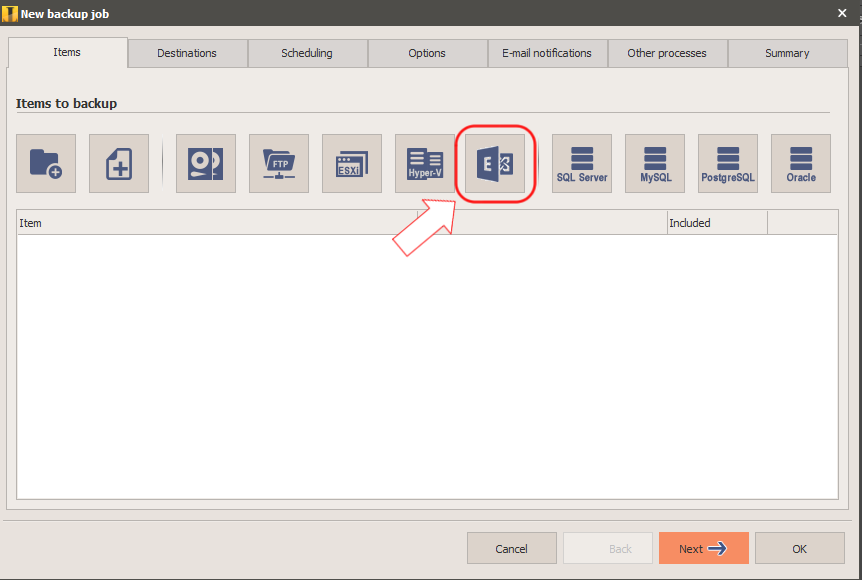
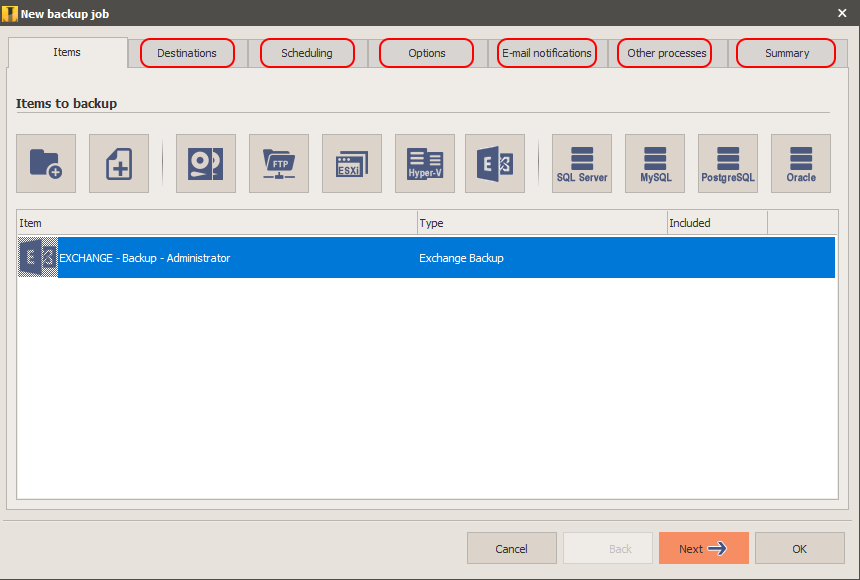
We add a new element to the “Backup Exchange” type backup:
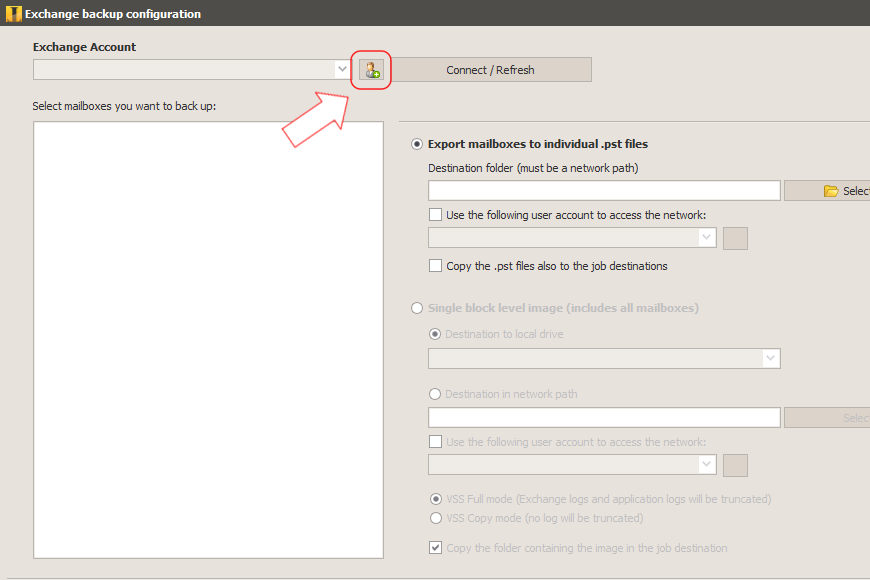
If the Exchange account is not already configured, click on the icon shown in the picture below to add one:
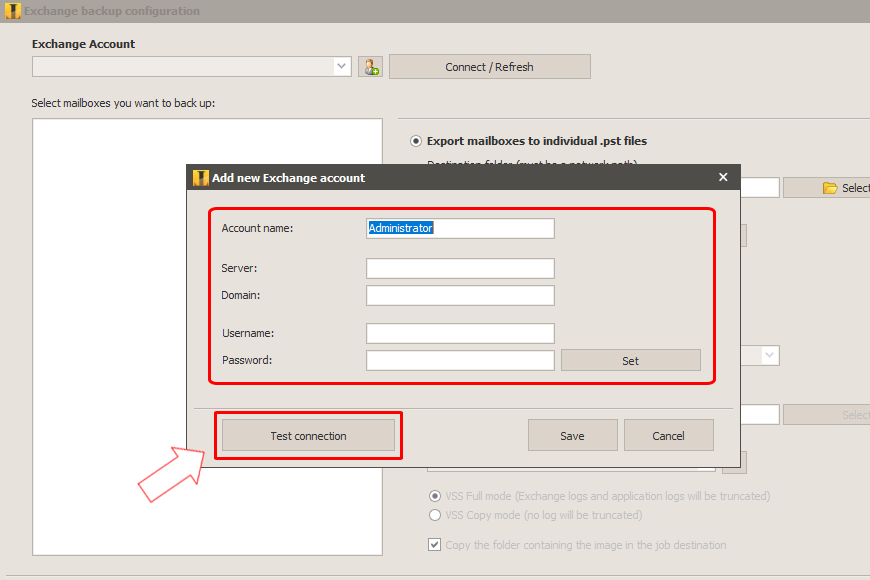
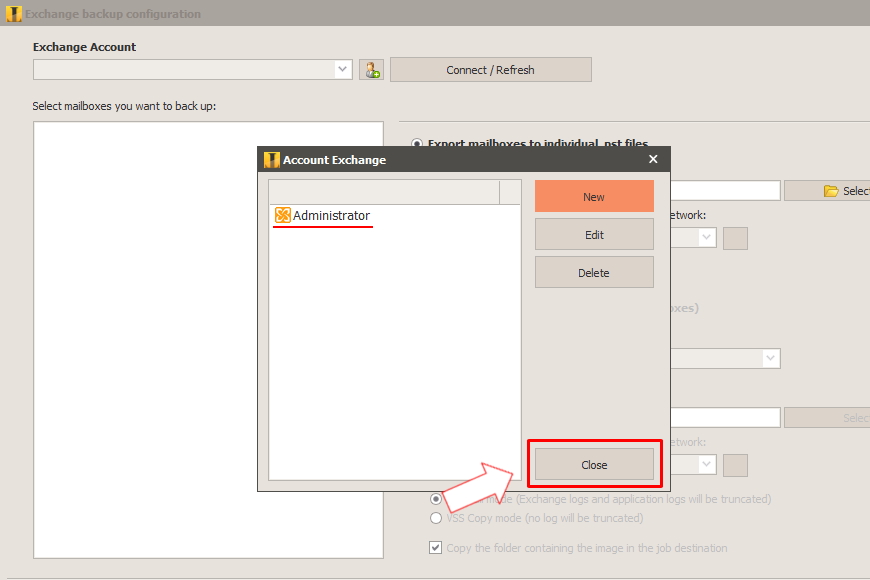
In the window that appears, enter the credentials of the Administrator of the Exchange server (mandatory!) to have the necessary permissions to perform the backup, along with the mail domain name, and where Exchange Server is installed. Once inserted, click “Test Connection” to check if they are correct and if the user has administrator permissions required to perform the backup (the user should enjoy the Import-Export Mailbox role). If all data is correct, a window will appear to confirm the connection with the Exchange server. Once this is complete, click the “Save” button to save the account.
Once the account is created (highlighted in the image below), click on the “Close” button to return to the Exchange backup window.
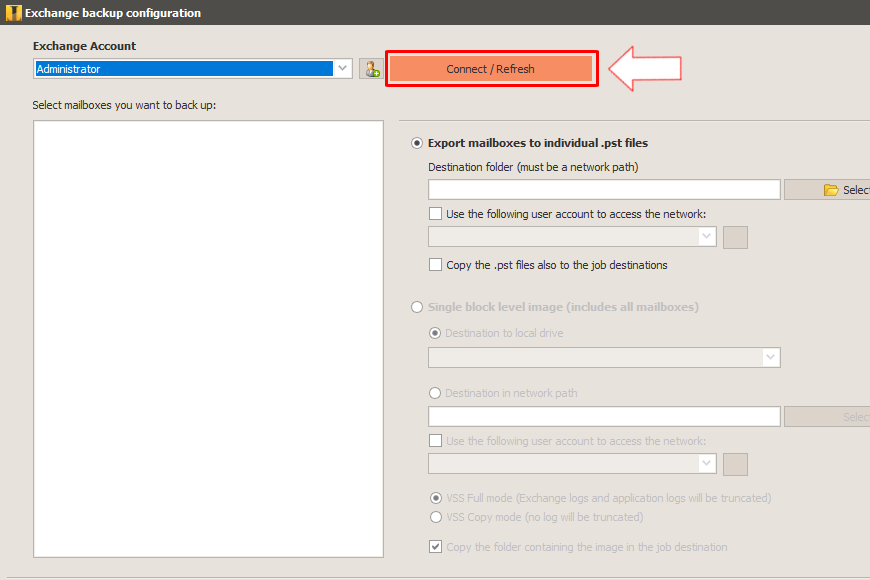
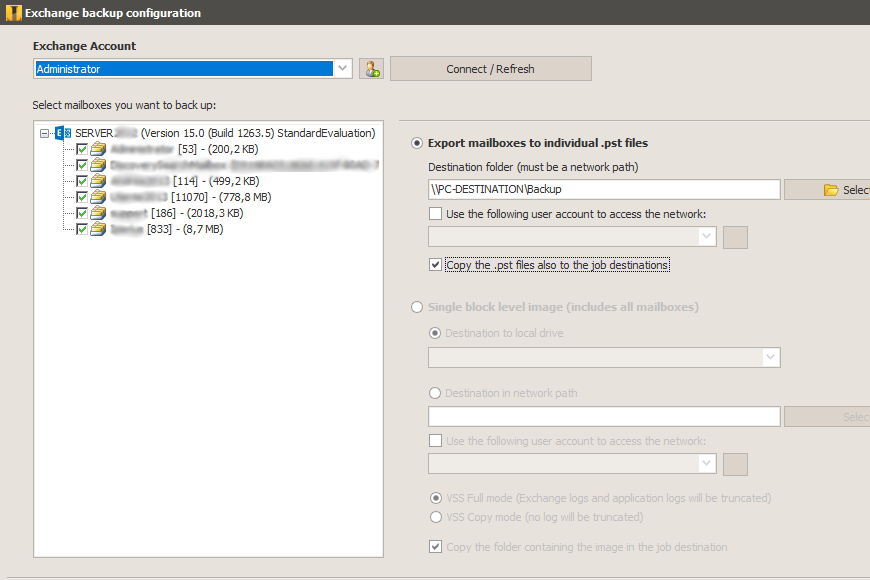
The account you create will appear as selected from the drop down menu (if is not so, select it manually). Now just click on the “Connect/Refresh” button to load the list of mailboxes on the server and its data (size, number of items, etc.)
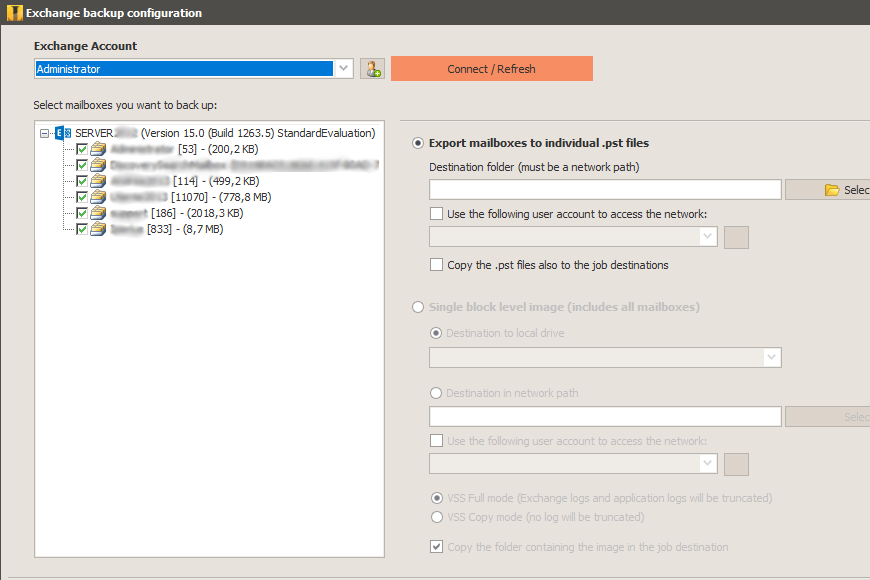
Once loading is finished (it can take more or less time depending on the performance of the server and/or workstation), the name will appear in the Exchange server, with the list of mailboxes present inside. Iperius will have already selected all mailboxes by default, but obviously you can deselect those that you do not want to back up (or vice versa).
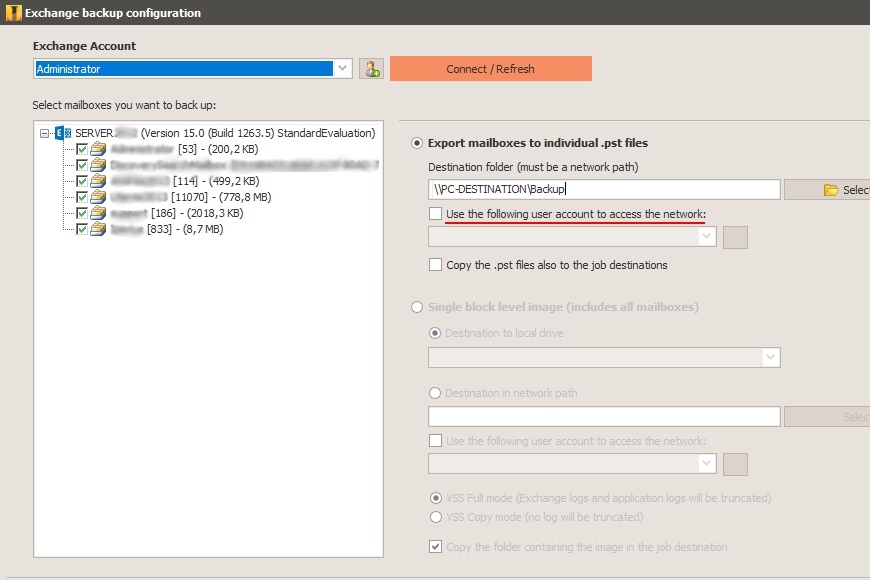
Having done this, you need to add a destination folder for the .pst files that will be created by the backup operation. This folder must necessarily be entered in UNC format, or as a network path, even if directly saving on the PC from which you are accessing Iperius. It must also be set so that the “EXCHANGE TRUSTED SUBSYSTEM” service has read/write permissions on it. Such permits are critical to the successful backup, so be careful not to omit this step. (N.B.: If access to the network folder is served by a particular account, just add it after you have checked the box highlighted in the image below).
If you want to copy the files in other destinations in addition to that of the default network (local folders, FTP locations, cloud backup on Google Drive, OneDrive, etc.), simply tick the box “Copy the .pst file even from the backup operation destinations” and then add the destination from the main backup operation screen (to which you will return automatically after clicking the OK button (or Cancel) at the bottom).
Clicking the OK button will confirm the selected settings (boxes for export, target location, account used for backup, etc.) and return to the main operation screen (see image below) where you can complete the set-up with additional items such as additional destinations (see previous step), backup schedule, via e-mail notifications of backup results, etc. To scroll forward through the various tabs, just click on the “Next” button.
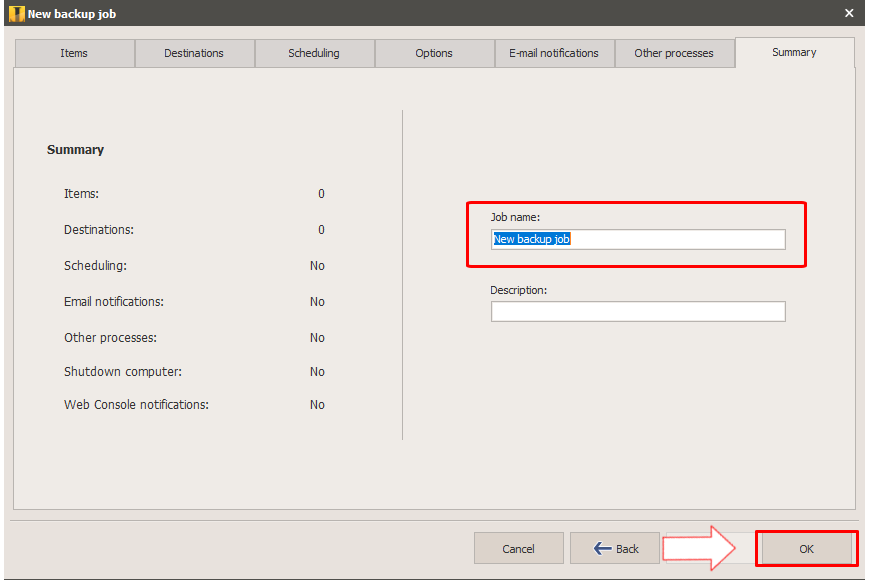
In the last tab, called “Summary”, set a name (and possibly a description) for the backup operation that is being created, so as not to confuse it with other operations already created or to be created in the future. Once done, click on the “OK” button to confirm the backup settings.
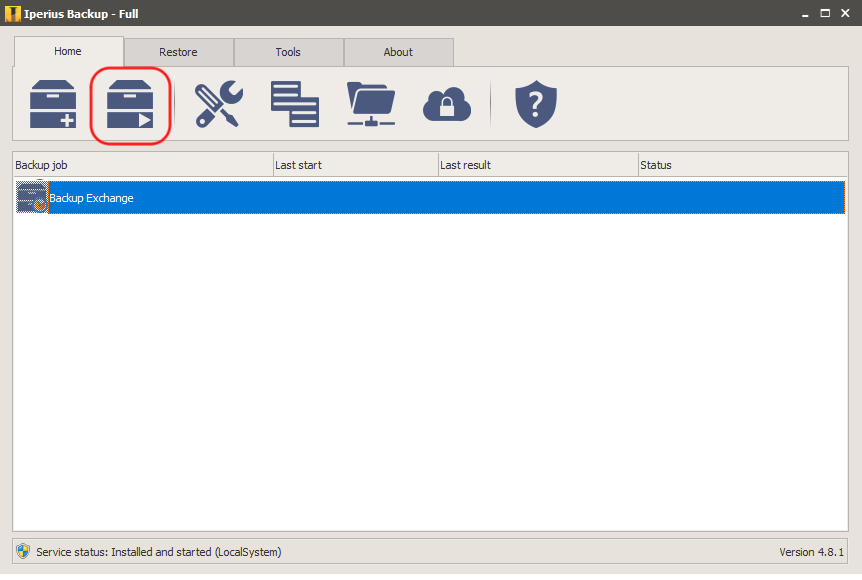
At this point everything is set! The last thing to do is launch the backup. To do so, select it from the list of backup and click on the icon shown below (“Run selected backup operation”). An upload window will appear that will show the progress of the backup and any errors that occurred.
To read our tutorial dedicated to the Exchange restore and how to Import .pst files into mailboxes with Iperius Backup, just click on the following link:
https://www.iperiusbackup.net/restore-exchange-import-file-pst-mailbox-posta/
Kindly advise does Iperius supports Exchange 2019 backup and export to pst files
Hi,
yes, it’s supported.
For more technical support open a ticket on https://support.iperius.net