Microsoft Teams has become a pivotal collaboration tool in today’s work environment, especially within the Microsoft 365 ecosystem. It offers real-time chat, meetings, calls, and collaboration on Office documents, facilitating seamless communication and teamwork, irrespective of participants’ locations. As a trusted solution for organizations aiming to maintain connectivity and productivity in a digital and dispersed workplace, Teams’ significance is undeniable. Nonetheless, the imperative for security and data recovery capabilities in the event of technical glitches or cyber threats cannot be overstressed, highlighting the importance of regular Teams data backups.
Iperius Backup stands out as a comprehensive solution for Microsoft 365 backup, encompassing Exchange Online for all Microsoft 365 email accounts, OneDrive for document and file storage within the Microsoft 365 organization, and SharePoint for all associated sites. From its 8th version, Iperius also supports the backup of Teams chats, attachments, and user data. Offering a perpetual license and an unbeatable price, Iperius enables the backup of unlimited Teams accounts.
Moreover, Iperius excels in performing continuous incremental and differential backups, allowing for granular restoration. It supports transferring backups to unlimited destinations, including local NAS and cloud services, and provides options for compressing backups for storage on Google Drive, Amazon S3, Wasabi, Backblaze, IBM Cloud, Azure, and other S3-compatible services.
With more than a decade in the market and distribution across over 180 countries, Iperius Backup’s reliability and effectiveness, coupled with the security assurance, perpetual licensing, and cost-effectiveness, make it the premier choice for Microsoft 365 backup solutions.
Download the free version of Iperius Backup and try the Microsoft 365 backup immediately.
Now, let’s see a detailed short tutorial on how to configure a Teams backup
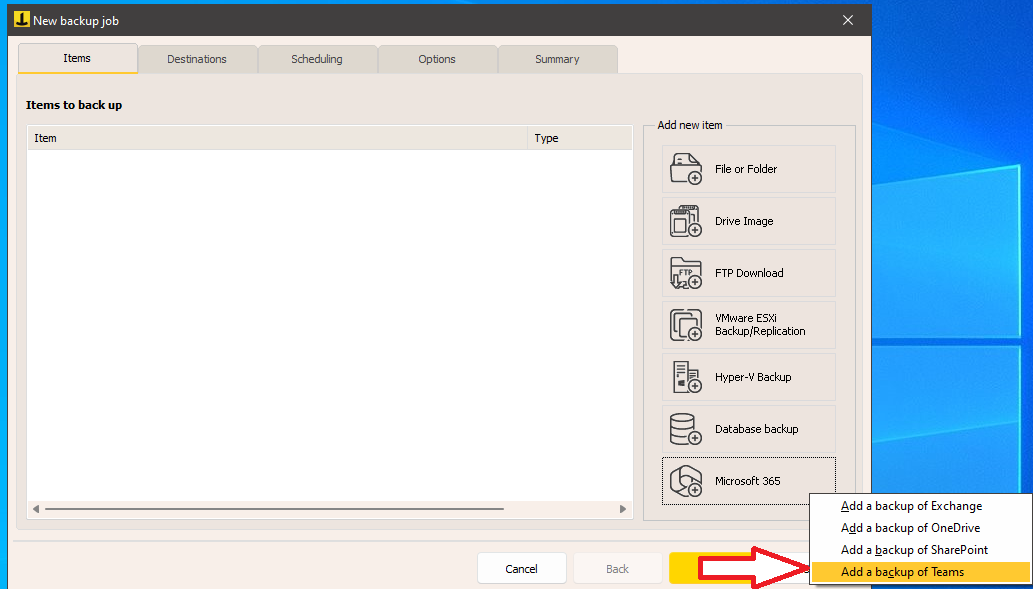
1) Creating a Teams Account
Create a new backup operation for Microsoft 365 and select Teams:
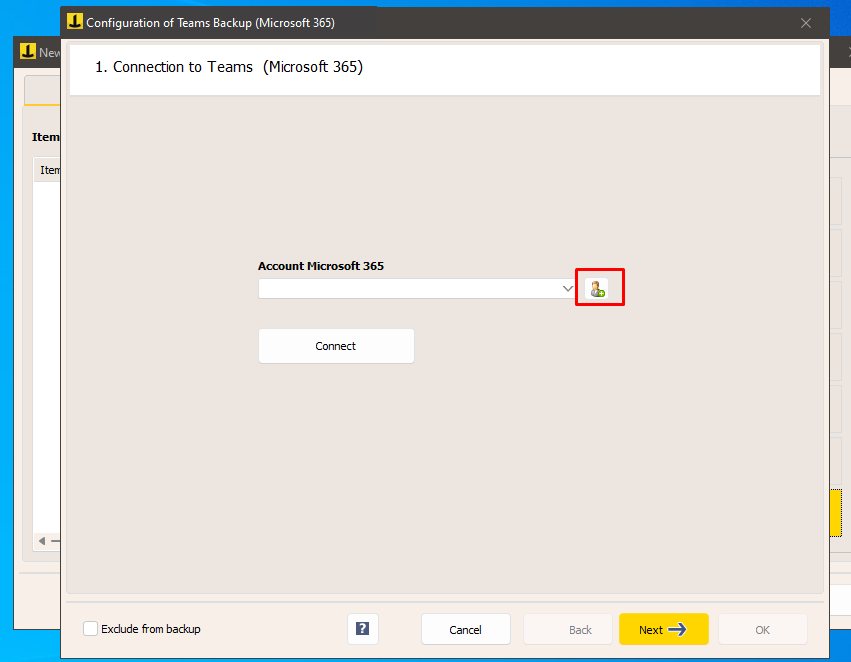
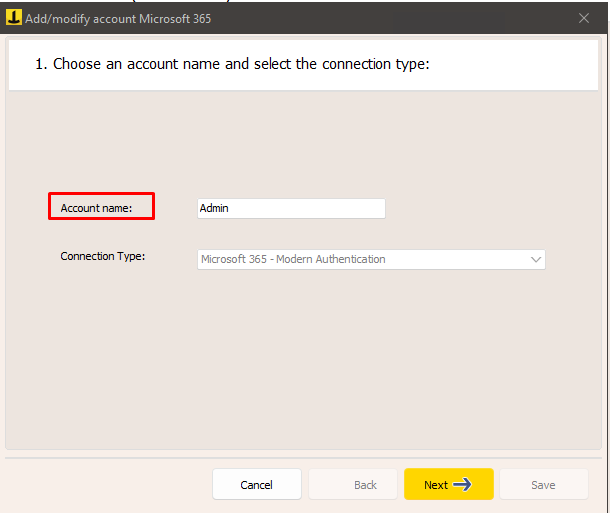
We add the Microsoft 365 account and choose the Account Name:
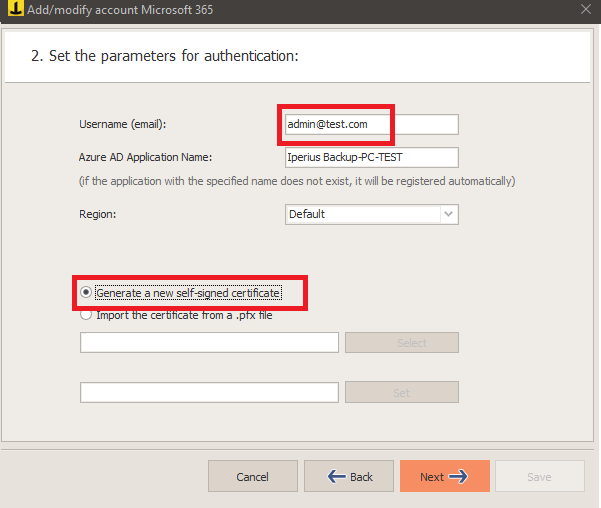
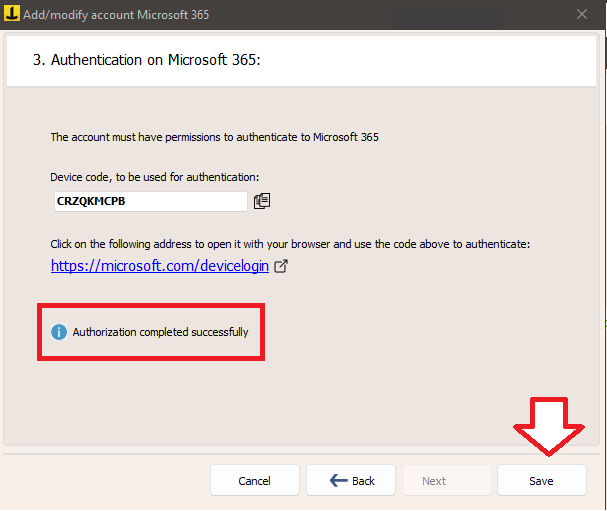
Enter your account’s username (email) and a new “Azure AD Application name”.
We then select the Region of our organization and click on “Generate a new self-signed certificate”. If you already have a certificate, you can select it using the appropriate button.
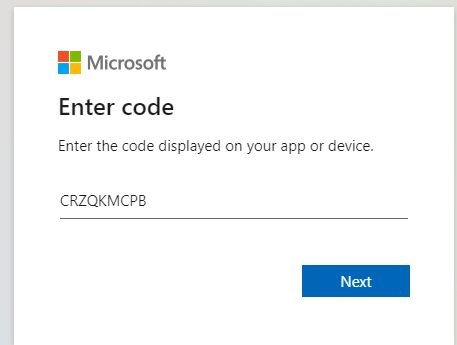
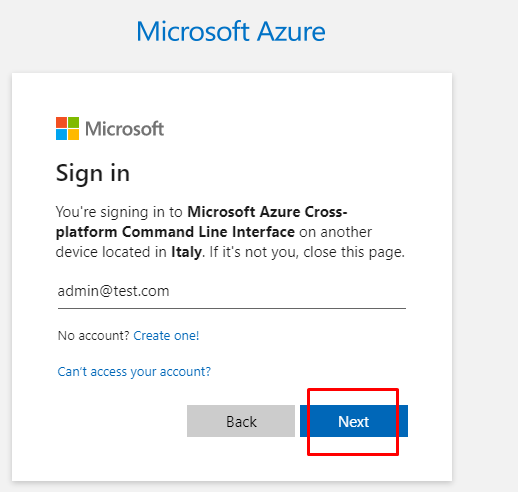
To complete Modern Authentication you need to copy and paste the “Device Code” into the Microsoft 365 login page, as described in the following steps:

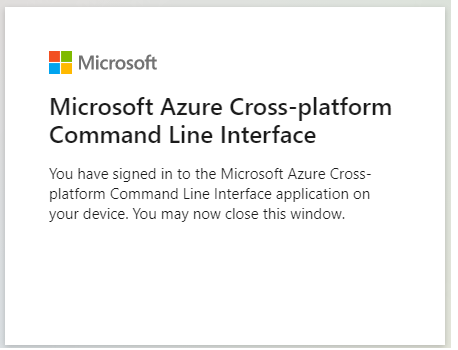
Now we can close the browser and Save the Teams account configuration.
Finally, click on the “Connect” button. If the connection was successful, we will get a positive message as shown in the next image.

Click on the “Next” button to view the list of accounts.
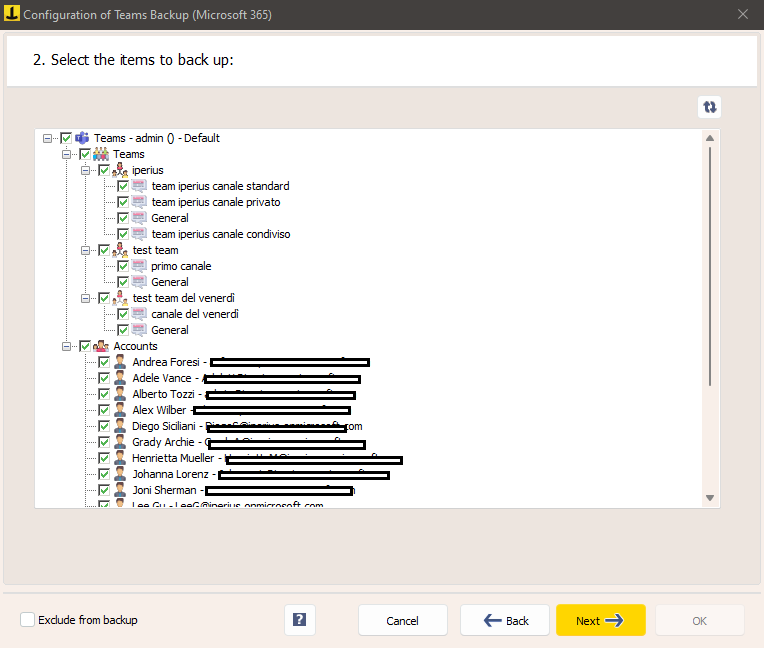
2) Select Accounts and Teams
Within seconds, the panel will populate with the accounts and Teams within your Microsoft 365 organization.
Select the accounts to download and click ‘Next':
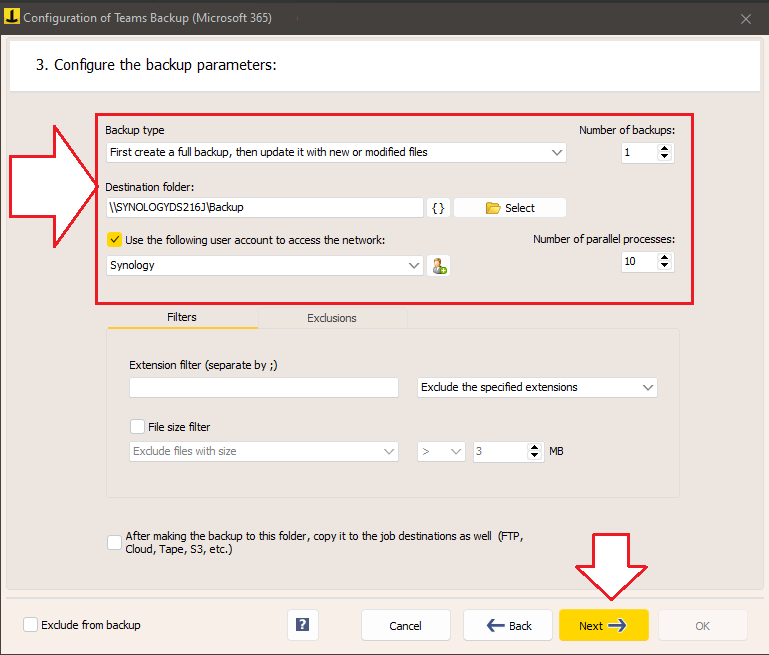
With Iperius it is possible to configure a complete, incremental or differential backups of the Teams (chats, attachments, users) also to a network destination, choosing the number of copies to keep.
It is also possible to set filters for file extension and size or directly exclude specific files and paths.
Finally, you can add a secondary destination to the backup, once the copy to the first configured destination has finished.
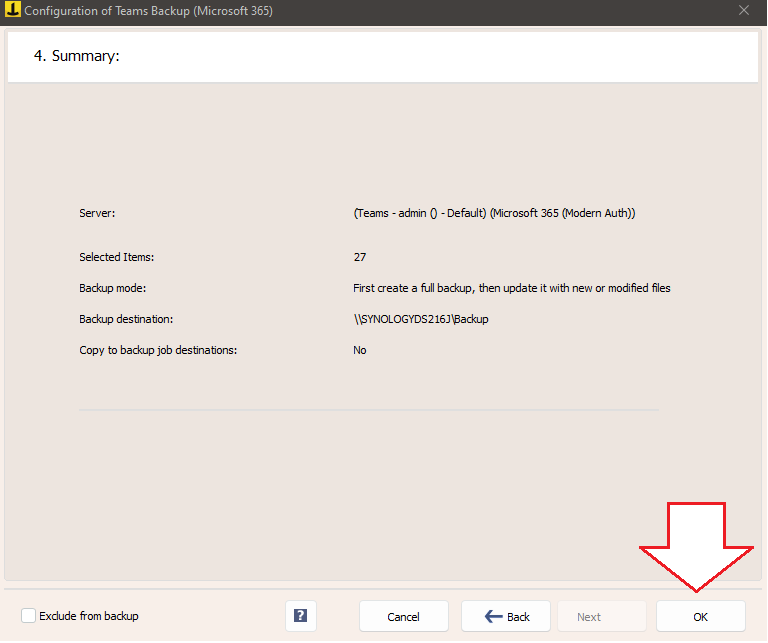
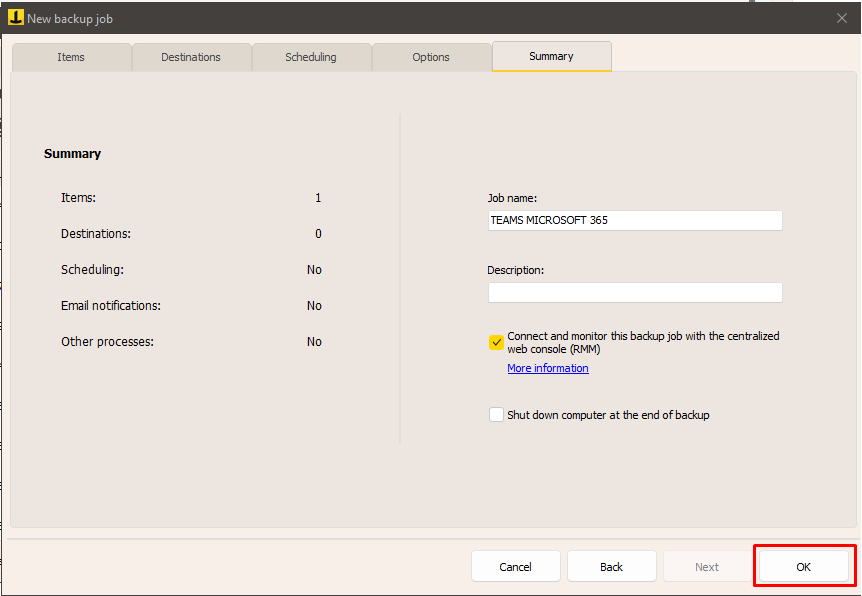
We check in the Summary that everything is ok and confirm:
3) Set Additional Destinations (optional)
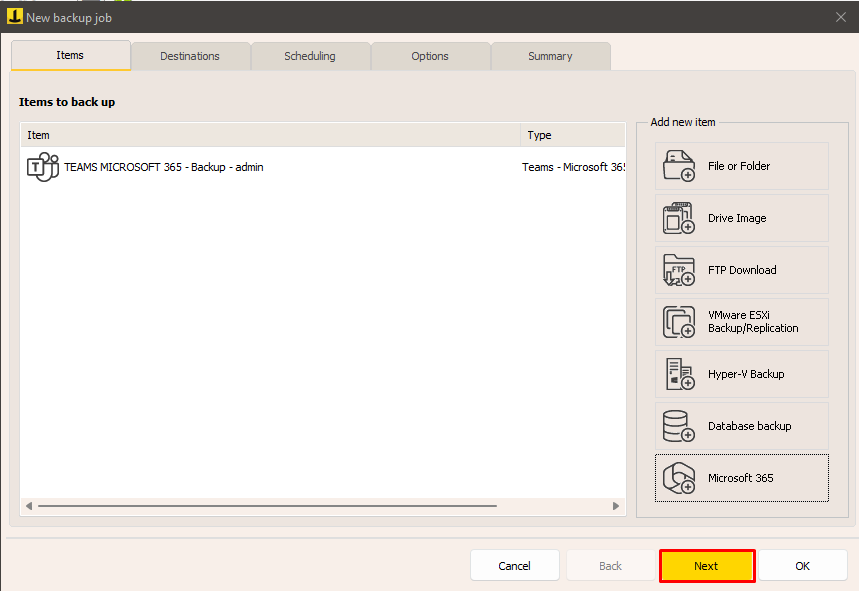
After configuring the Teams backup item, click on the ‘Next’ button to continue with the backup operation setup (see image below).
The next panel, ‘Destinations’, allows selecting one or more additional destinations for the backup by choosing among folders, tape drives, FTP sites, or cloud services (see next image). These options will be active only if the ‘Copy the exported files also to the destinations of the backup operation’ option in the Teams backup item is enabled.

To complete the backup configuration, click on the ‘Next’ button to access further settings, such as scheduling and email notifications for the backup results, until reaching the final ‘Summary’ panel. Here, you can assign a name to the backup operation and add any notes. Once complete, click on the ‘Ok’ button to confirm.
4) Start the backup operation
At this point, we will find the job we just created in the list of Iperius Backup operations. To start it, simply select it and click on the “Run” button, as highlighted in the image below:
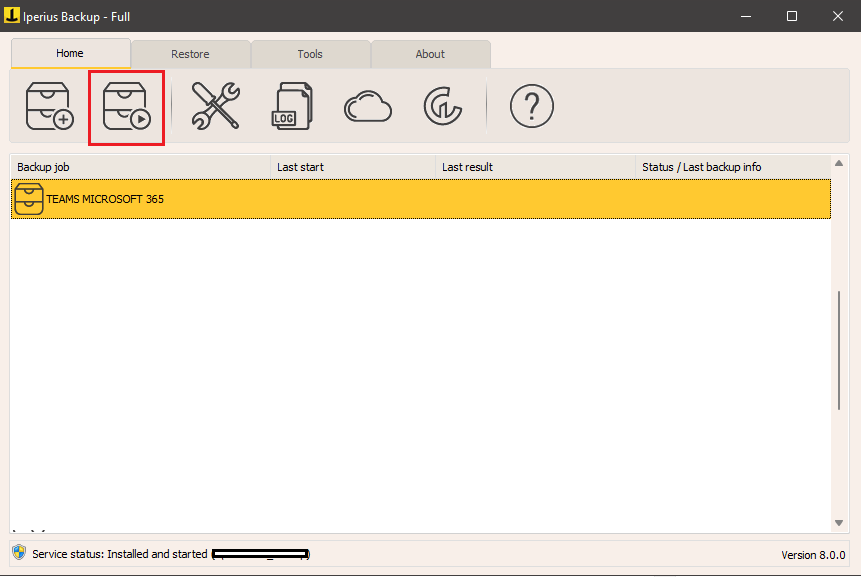
The job will launch and back up Teams.
(Italian)
PLEASE NOTE: if you need technical support or have any sales or technical question, don't use comments. Instead open a TICKET here: https://www.iperiusbackup.com/contact.aspx
**********************************************************************************
PLEASE NOTE: if you need technical support or have any sales or technical question, don't use comments. Instead open a TICKET here: https://www.iperiusbackup.com/contact.aspx
*****************************************