In this tutorial, we will look at the preliminary steps required to configure our Microsoft Exchange mail server to back up and restore mailboxes both remotely and not remotely. This guide can also be used to carry out backup and restore using the Iperius Backup software. We will start by setting up the necessary user permissions and then move on to configuring the Exchange server.
1) Assigning “Organization Management” and “Import Export PST” roles
The first step required to back up and/or restore Microsoft Exchange mailboxes without any problems is to assign the “Organization Management” group permissions and obviously the “Import Export PST” role to the user, which is essential for exporting and importing the mailboxes.
To do this, you just need to access the Exchange Control Panel (ECP) and type the address https://IPdelServer/ecp into your internet browser or, if you are already in the server, https://localhost/ecp On. The below page will appear (if you use Exchange 2013 or 2016).
(N.B.: if your browser gives you a security certificate error message, continue anyway in order view the page)
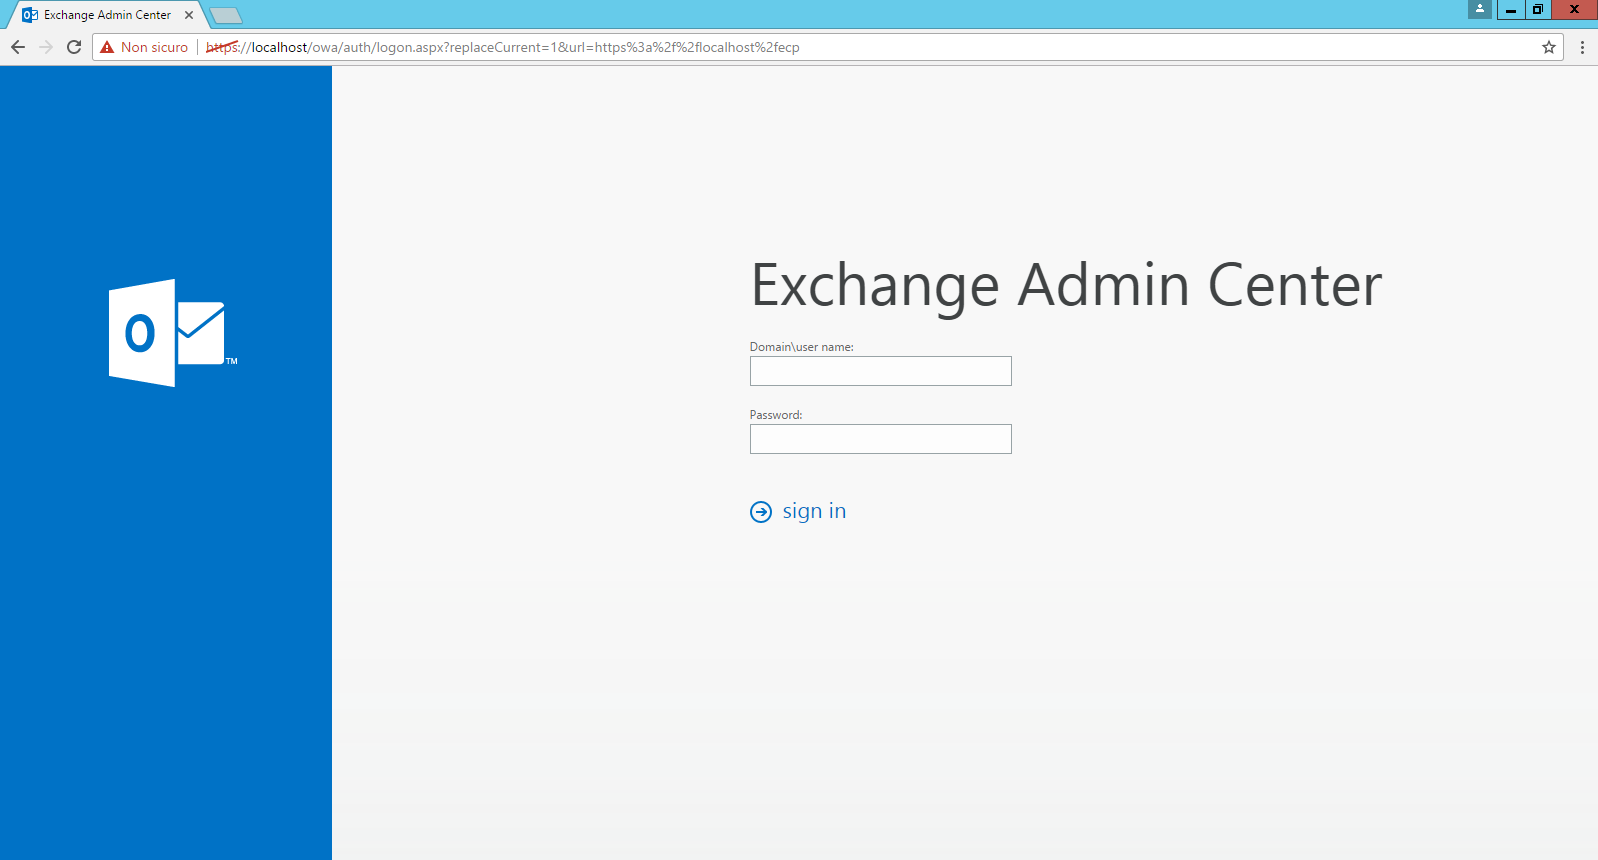
At this point, enter your access credentials (as Administrator, obviously) and log in. You will see the below page, where all the currently configured mailboxes on your Exchange server will be shown.
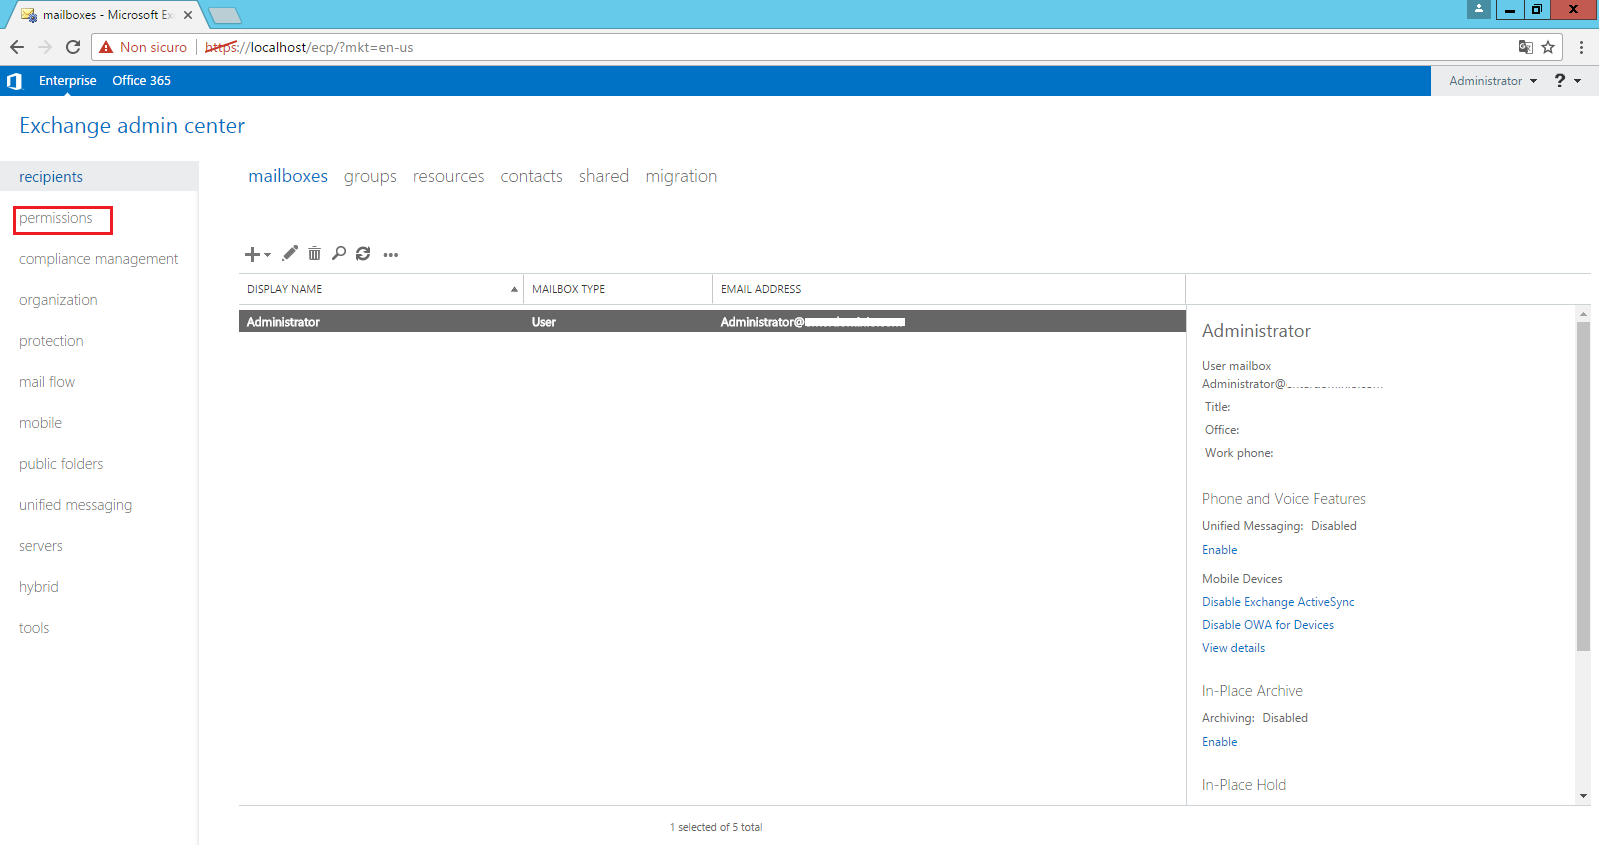
Now, click on “Authorisations” from the left-hand menu (indicated in the above image) in order to access the roles and permissions settings. The page that will load will look like the following:
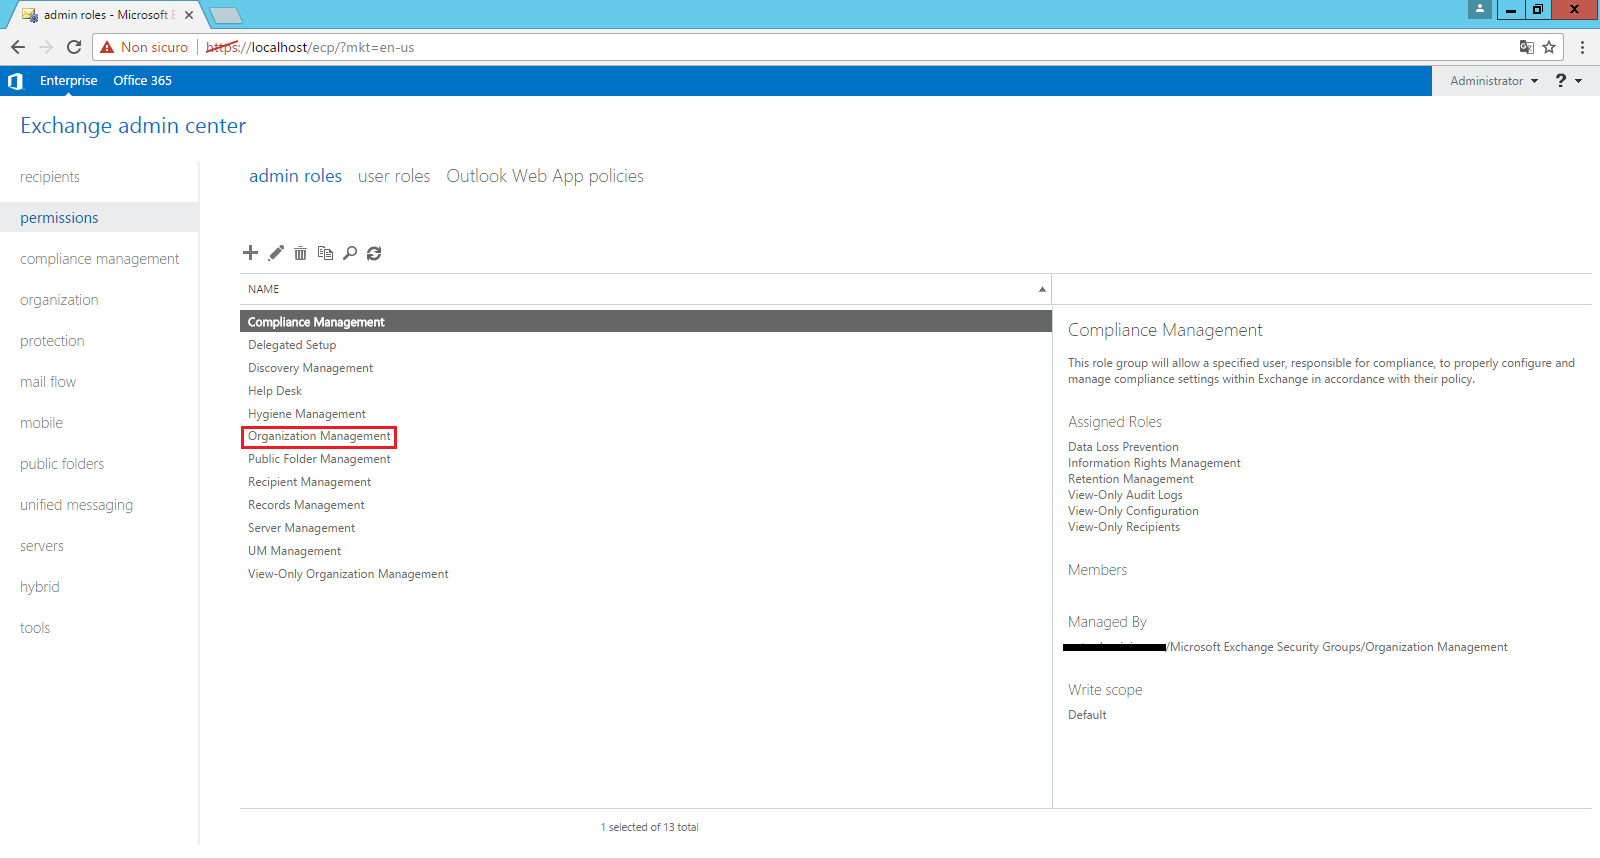
The next step is to add our user into the “Organization Management” group, if they are not already in it.
To do this, firstly, double-click on the text “Organization Management”, found in the list of roles (see previous image).
A new window like this one will open:

In the new window, drag the scroll bar to the “Members” section. If your user is not in the list, click on the “+” button (indicated in the image) to add them. Another page will open, containing the list of all the users and groups configured on the Server:
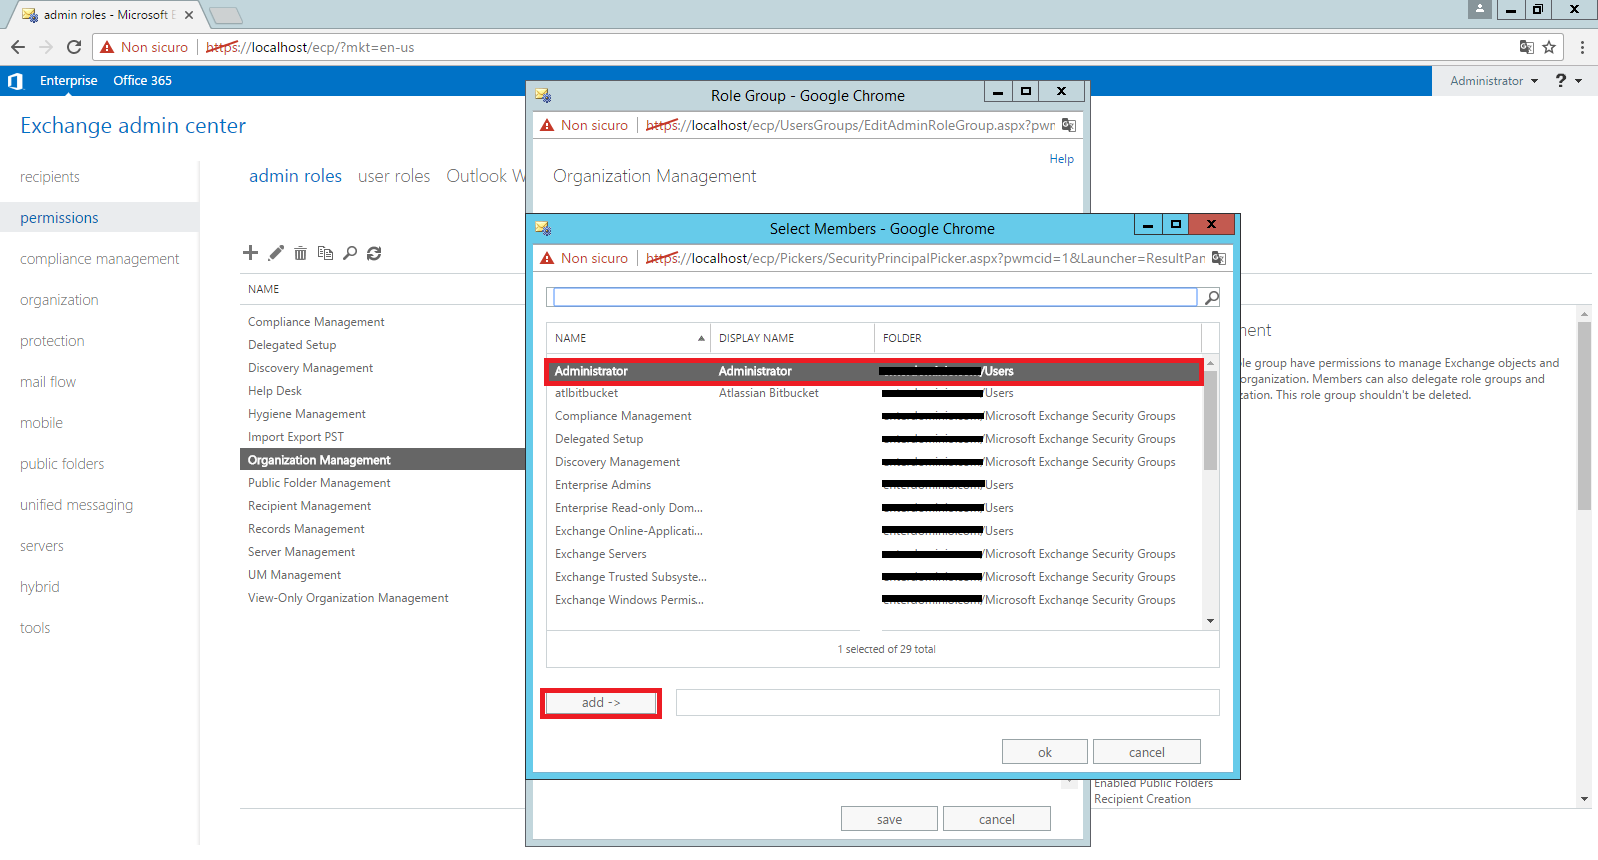
Find your user or the one you want to add to the group of “Organization Management” permissions (in my case, the user Administrator) and double-click or select them and click on the “Add” button below. The user will be added to the white box below:
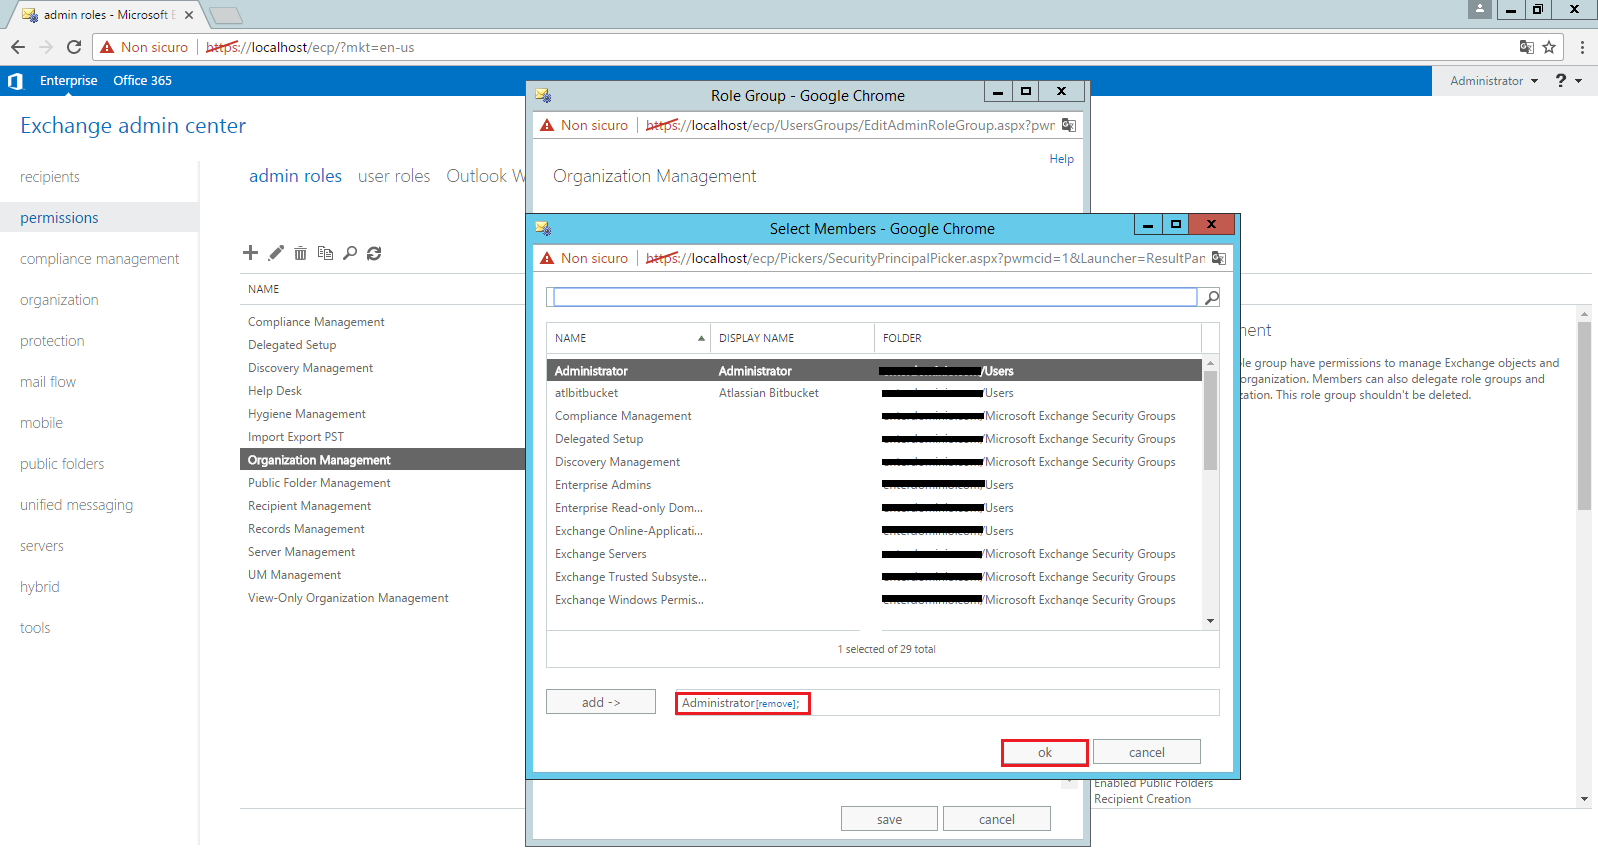
At this point, click “OK” to confirm your choice. The window will close and the user will be added to the “Members” section of the “Organization Management” group page:

Click on “Save” to re-confirm the changes made to the “Organization Management” group.
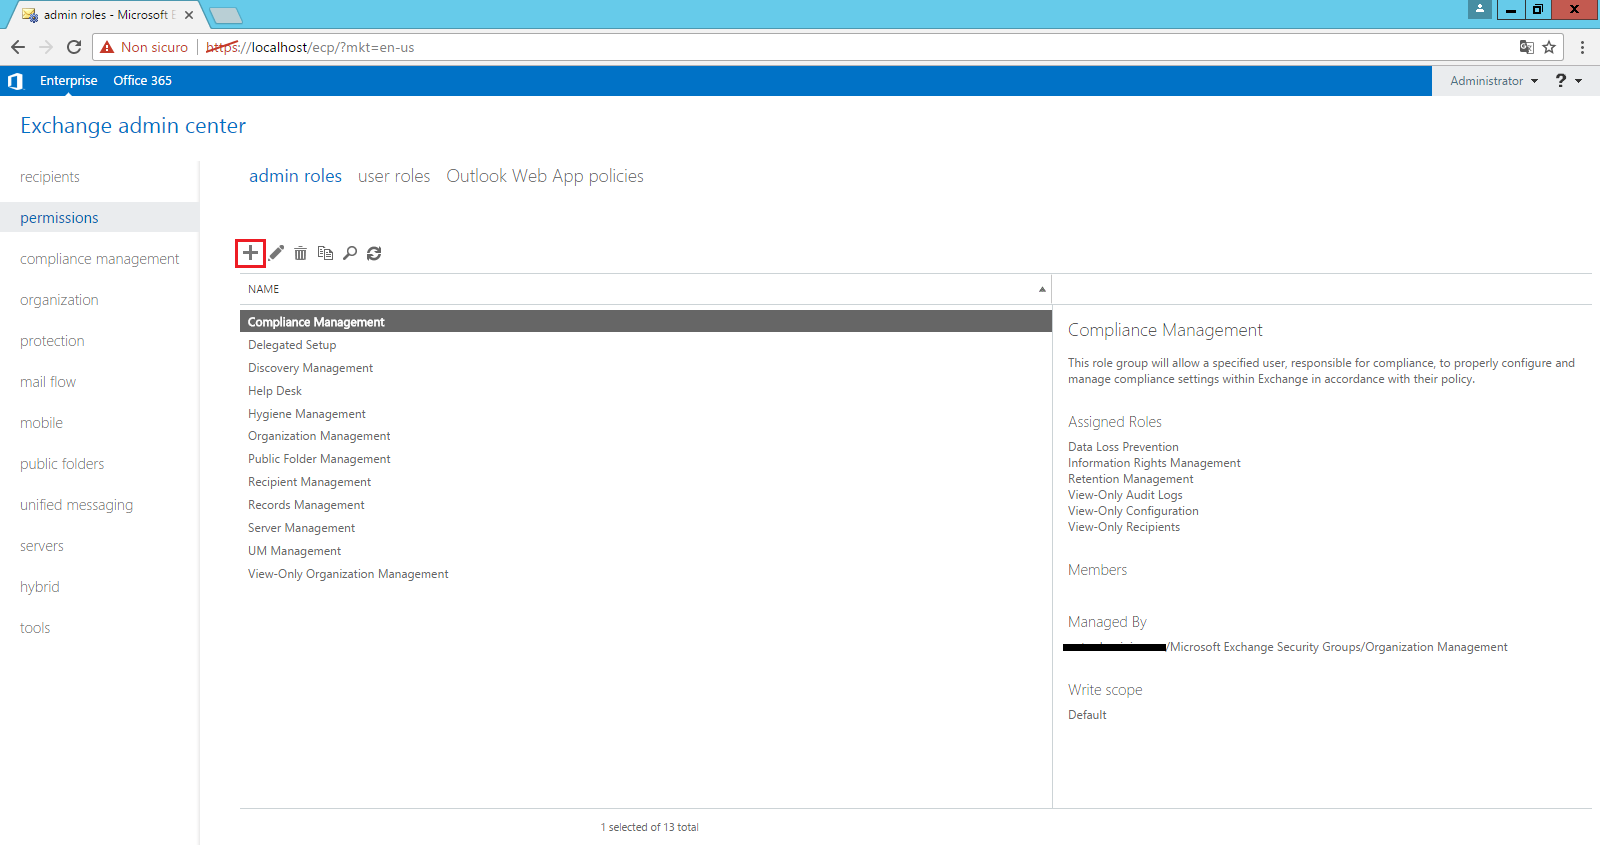
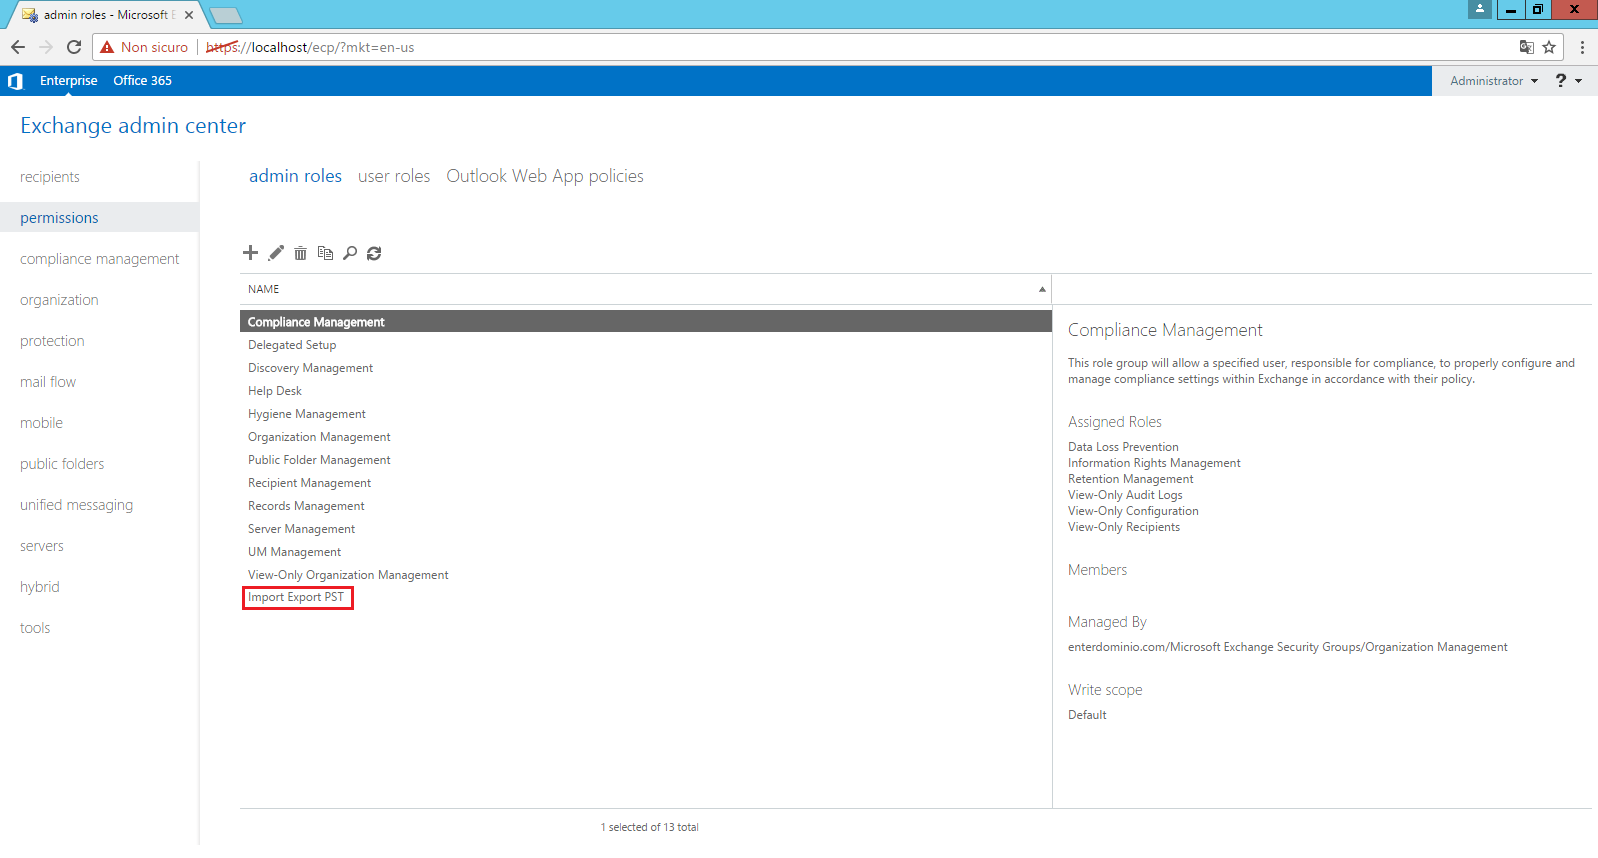
We have now returned to the first Authorisations window. Now, we will create a new role group exclusively for mailbox Import/Export permissions. Start by clicking on the “+” button shown in the below image:
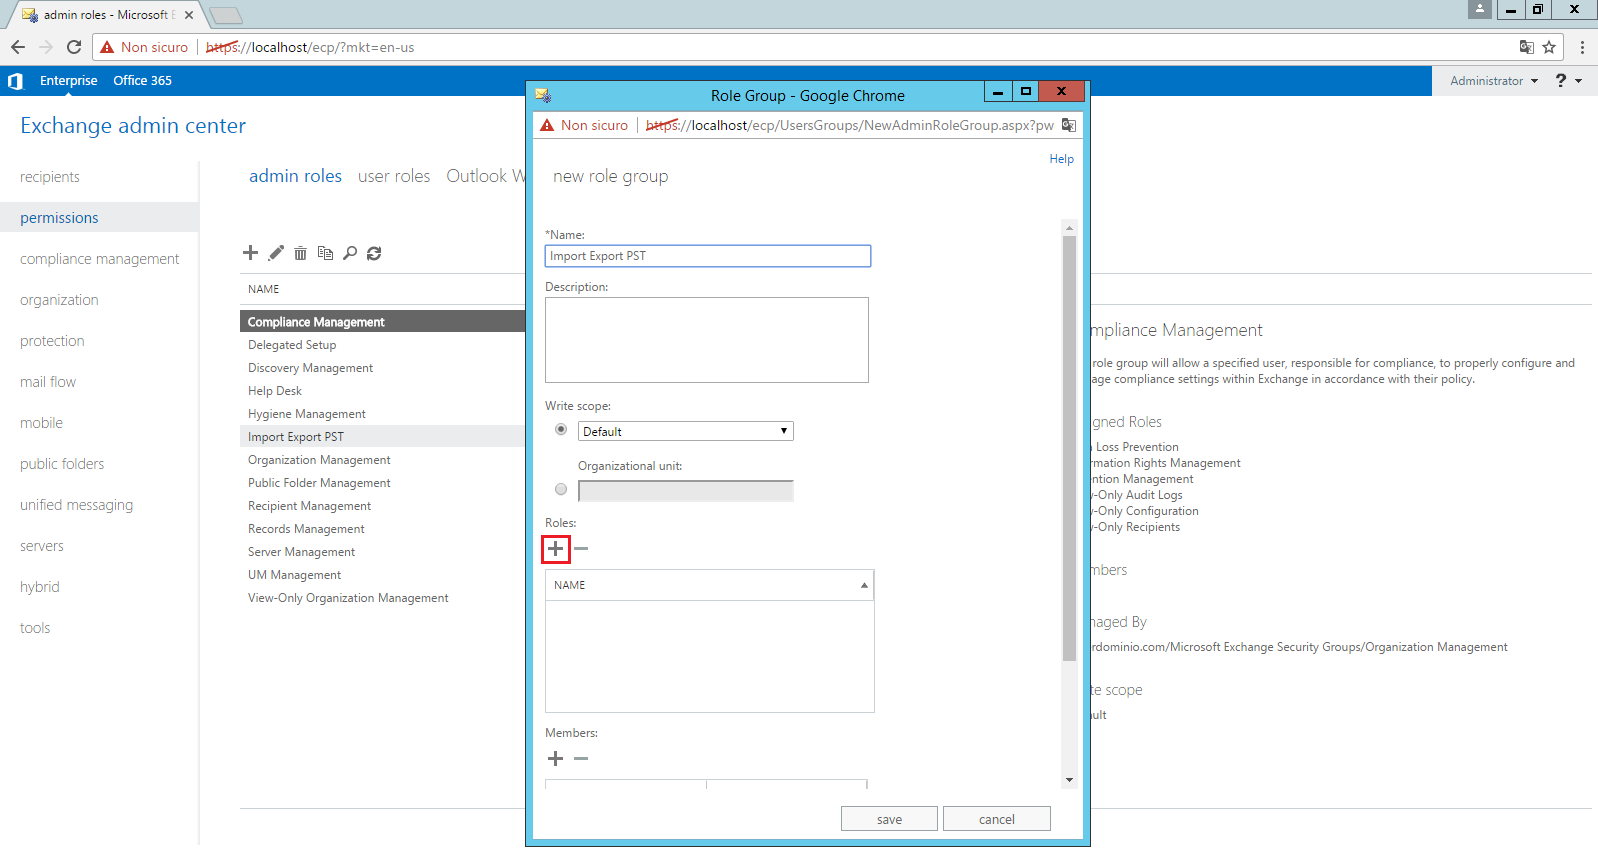
A window will open, in which you must specify the various settings of the role group you are creating (name, permissions, users, etc.).

In order, the first option is the name (indicated in the above image). You can freely choose the name, but I advise you to call it “Import Export PST” so that you remember which role it is assigned to. If you want, you can also choose a description for the group, but this is an optional setting that we will not consider here.
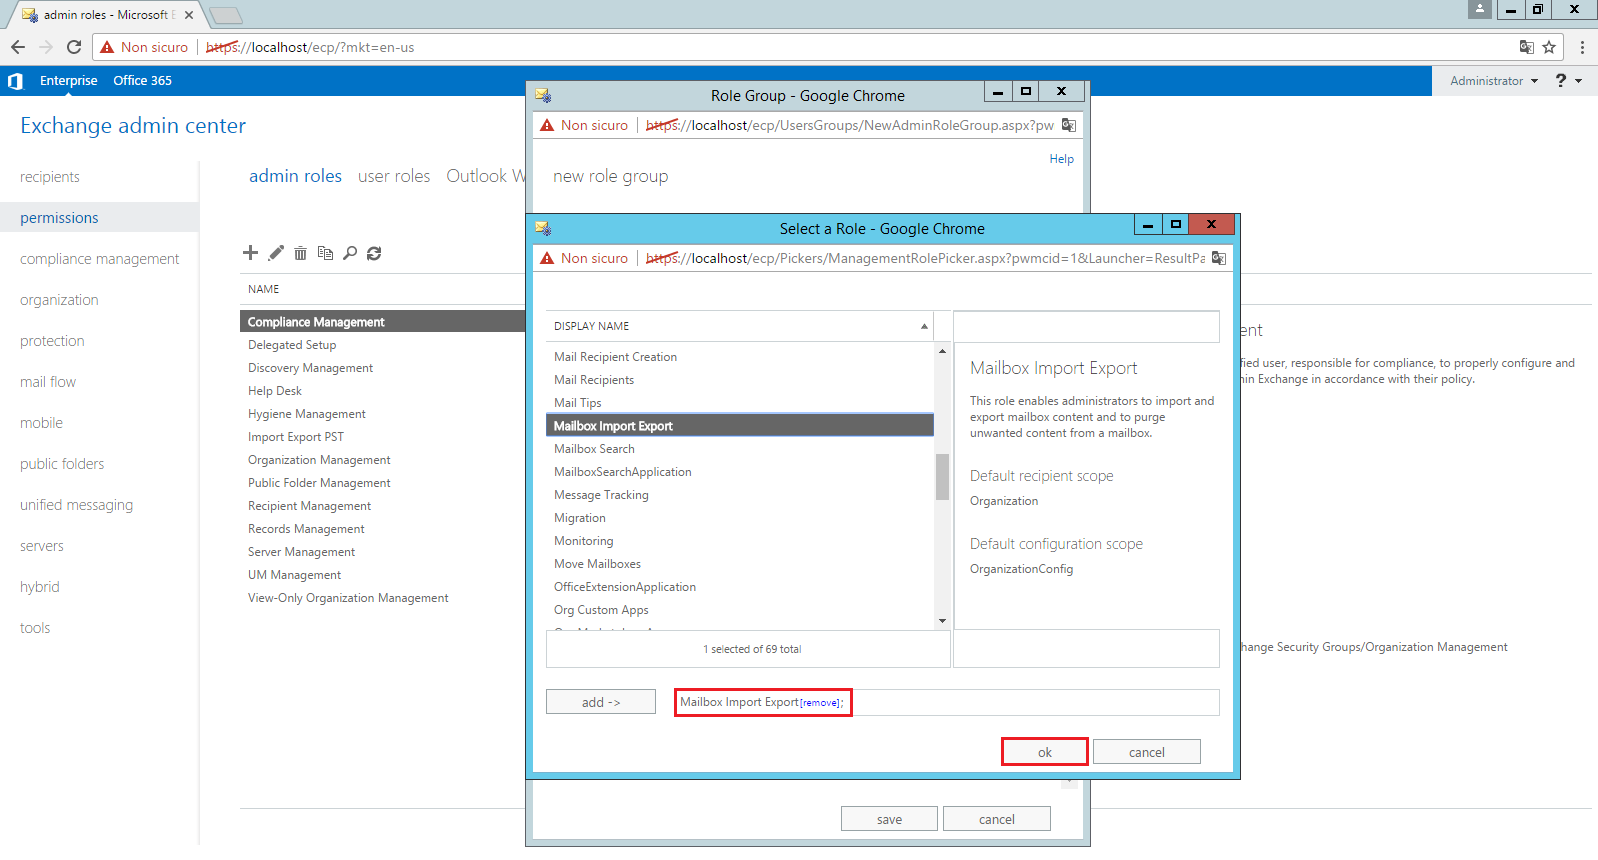
After typing the name, we will add the role to be assigned to the group. To do this, just click on the “+” button.
A window will open containing a list of all the roles in our Exchange server.
So, we select the role “Mailbox Import Export” and double-click on it, or click the add button further down.
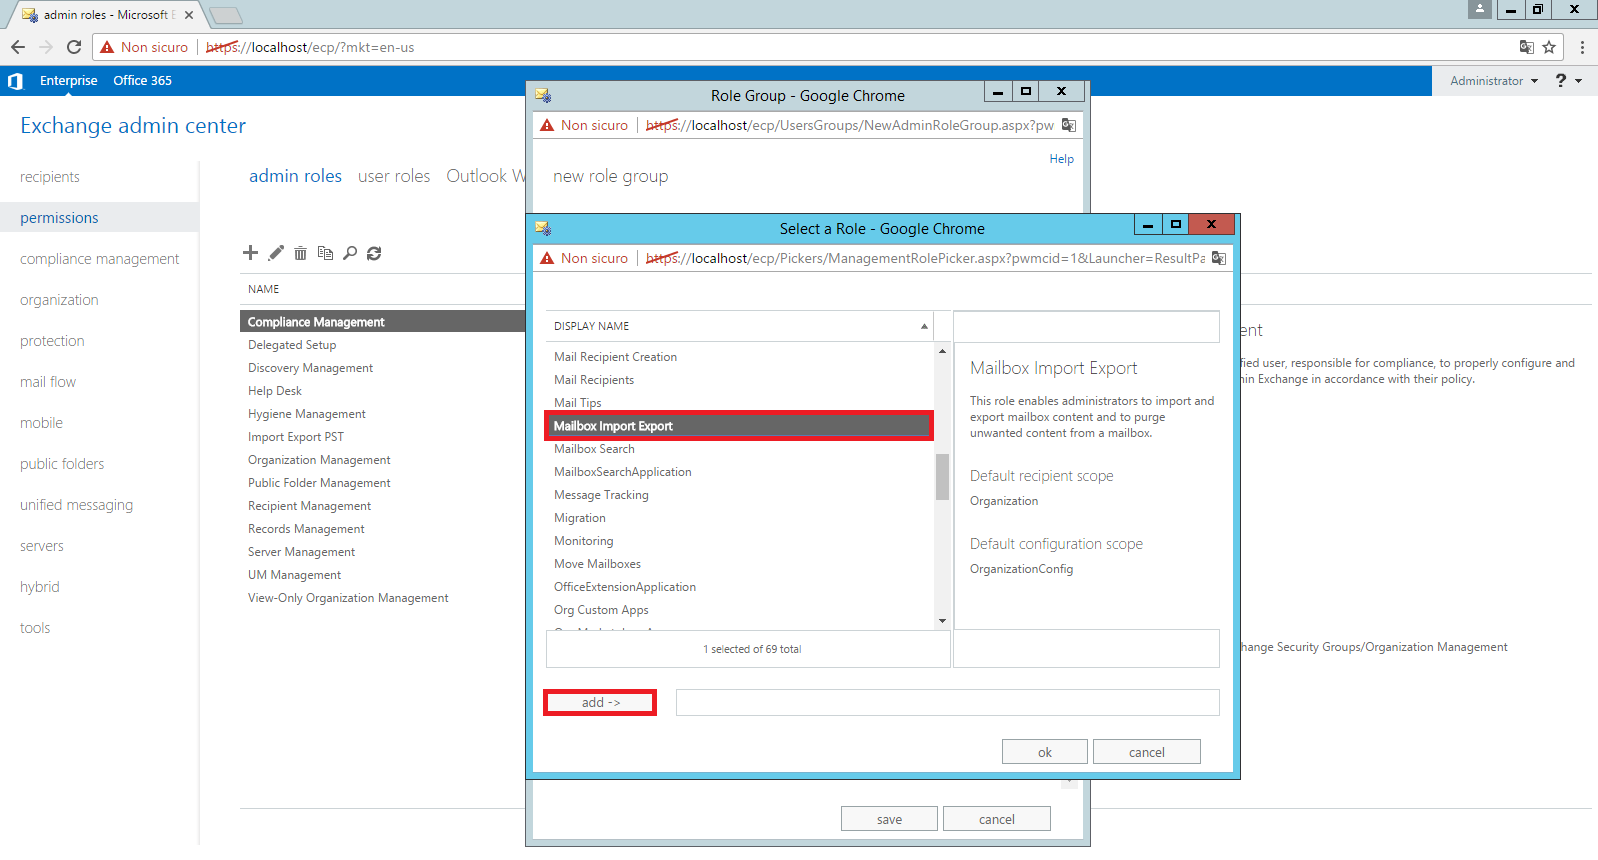
Finally, when this is done, we confirm the choice by clicking on the “OK” button.
At this point, the role will be added to the list and we can move on to the next step. Just as we did before for the “Organization Management” group, we must add the desired user to the group we are creating. To do this, click on the “+” button:
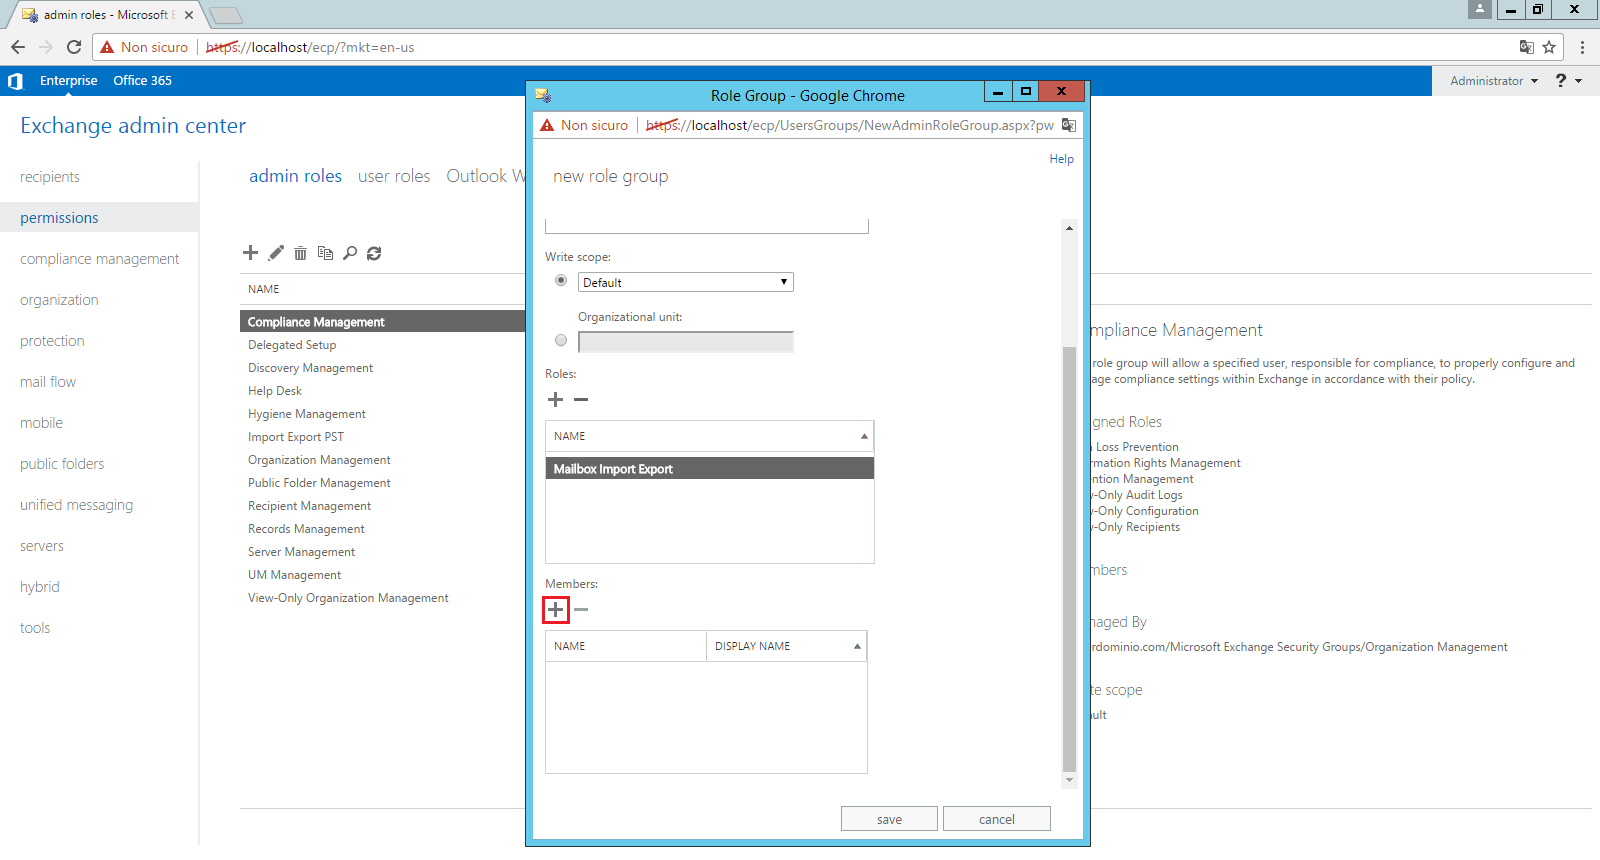
A window will appear, in which, as before, you must select the user that will be given the permissions of the group we are creating. In my case, I will assign Administrator to the user.

At this point, as soon as you return to the previous window, just click “Save” to confirm the changes just made.
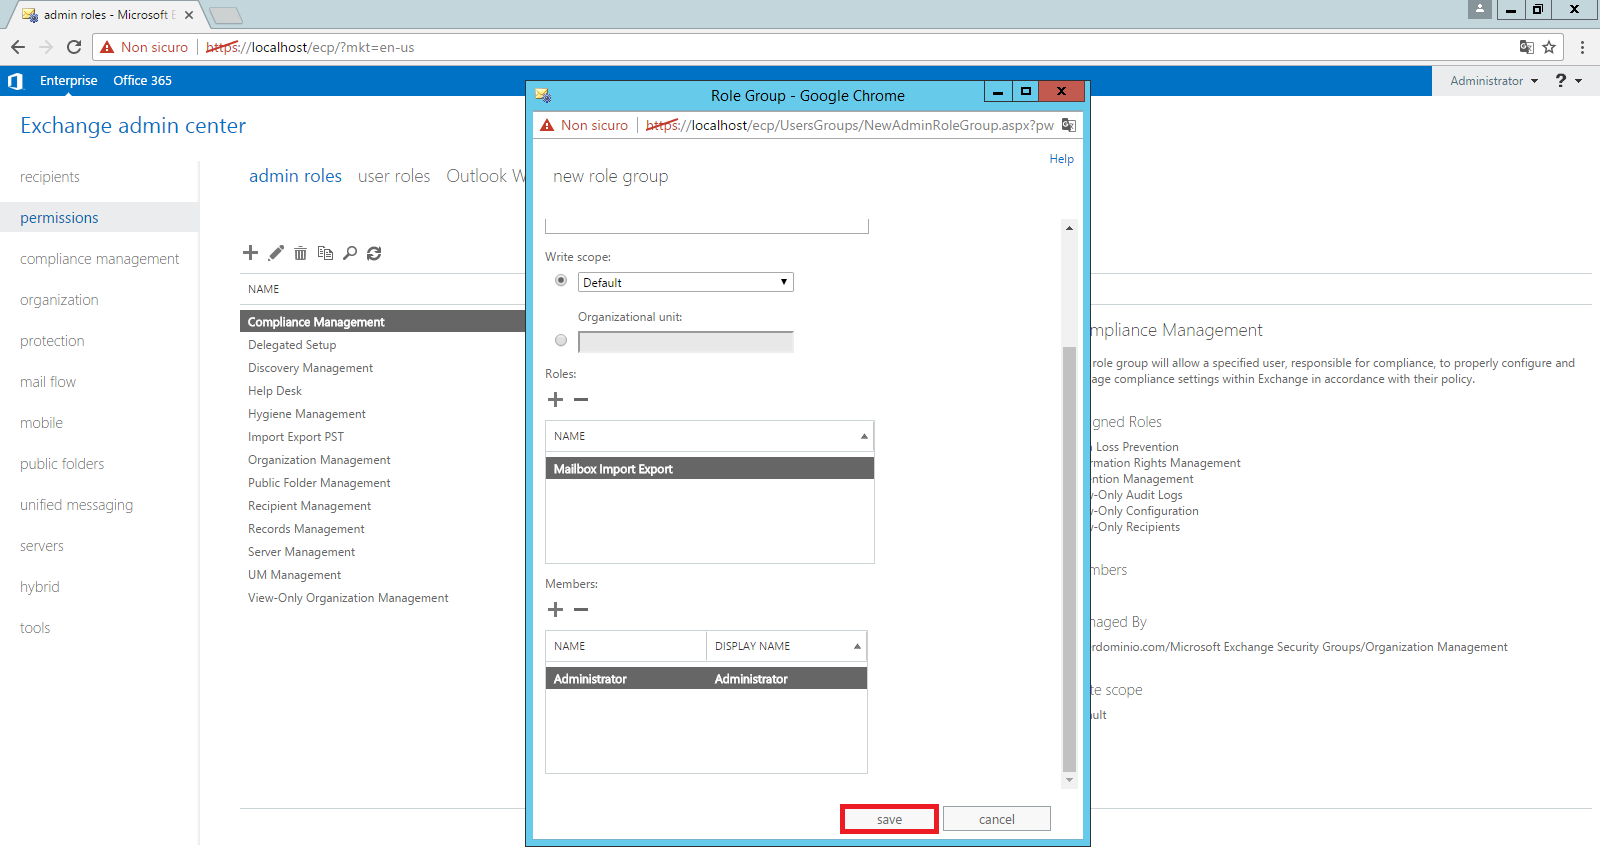
Now, the group will be added to the list of existing groups, by confirming the changes and assigning the mailbox Import and Export permissions to the chosen user.
2) Add the Microsoft Exchange server to the “Trusted Hosts” of the PC from which you are carrying out the backup
In order to correctly carry out a remote and non-remote backup, you need to add the server on which Exchange is installed to the “Trusted Hosts” (literally: trusted devices) of the PC from which we are launching the backup, if it is not already there.
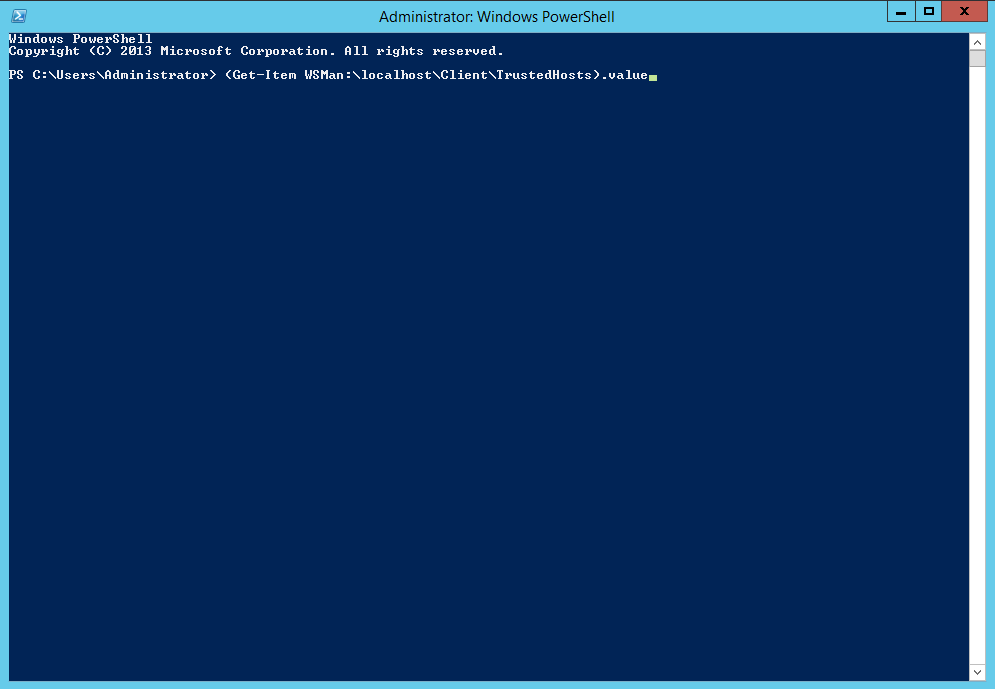
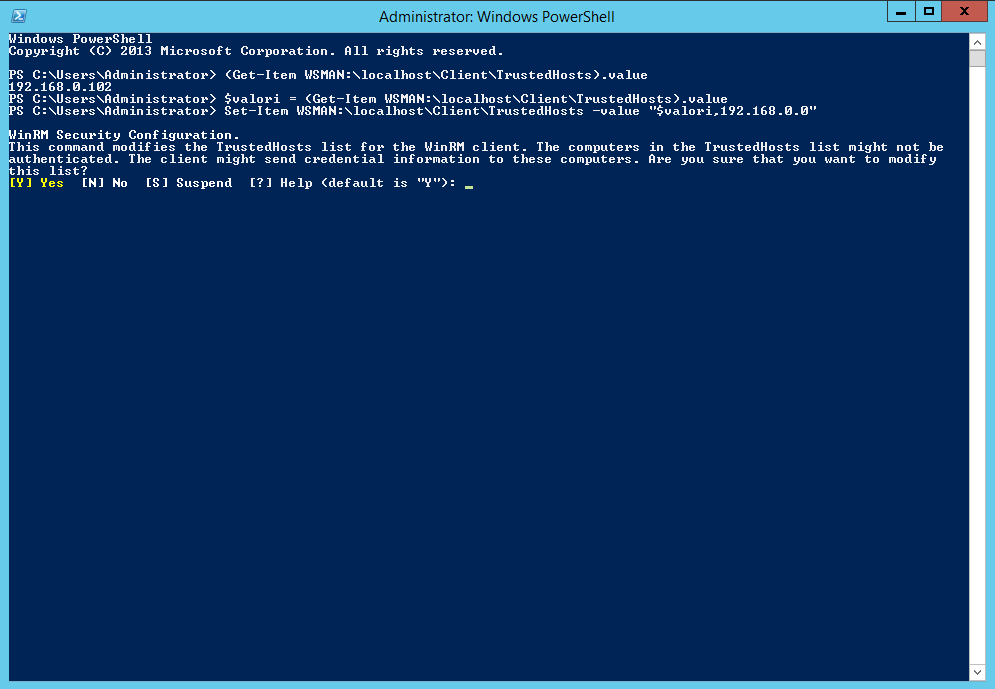
To check who the current Trusted Hosts are, so that you can check if the Exchange server is there, you need to open the Windows Powershell (you can find this among the Start menu applications) as the Administrator user and type the following character string (see below image): (Get-Item WSMAN:\localhost\Client\TrustedHosts).value
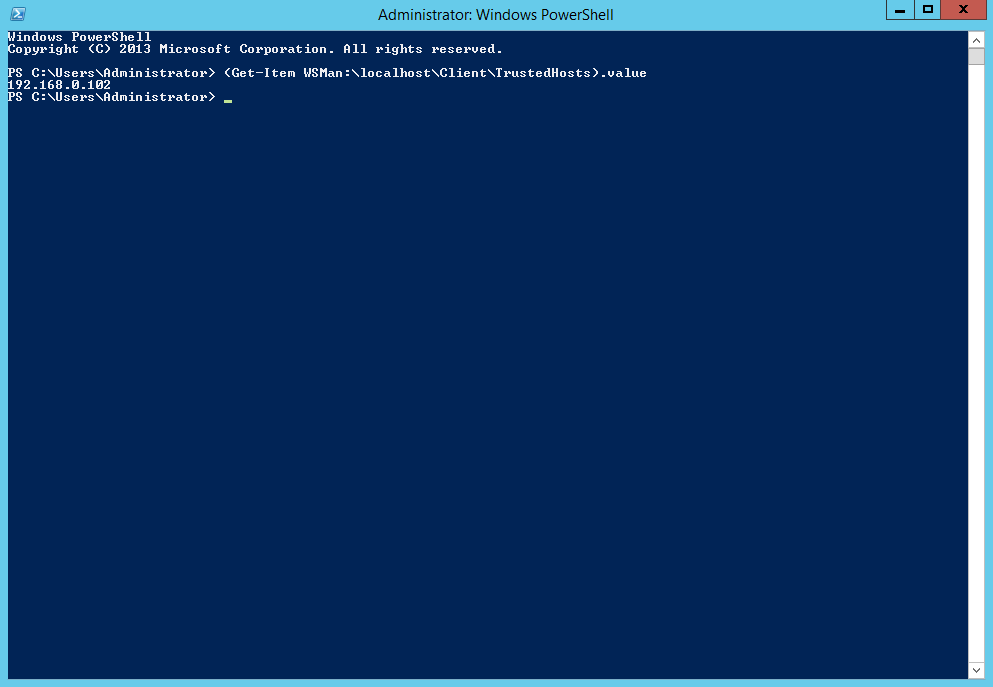
When you hit enter, a list of IP addresses and/or PC names already in the list of Trusted Hosts will appear. In my case, there is only one. If there are none at that moment, the command will return nothing:
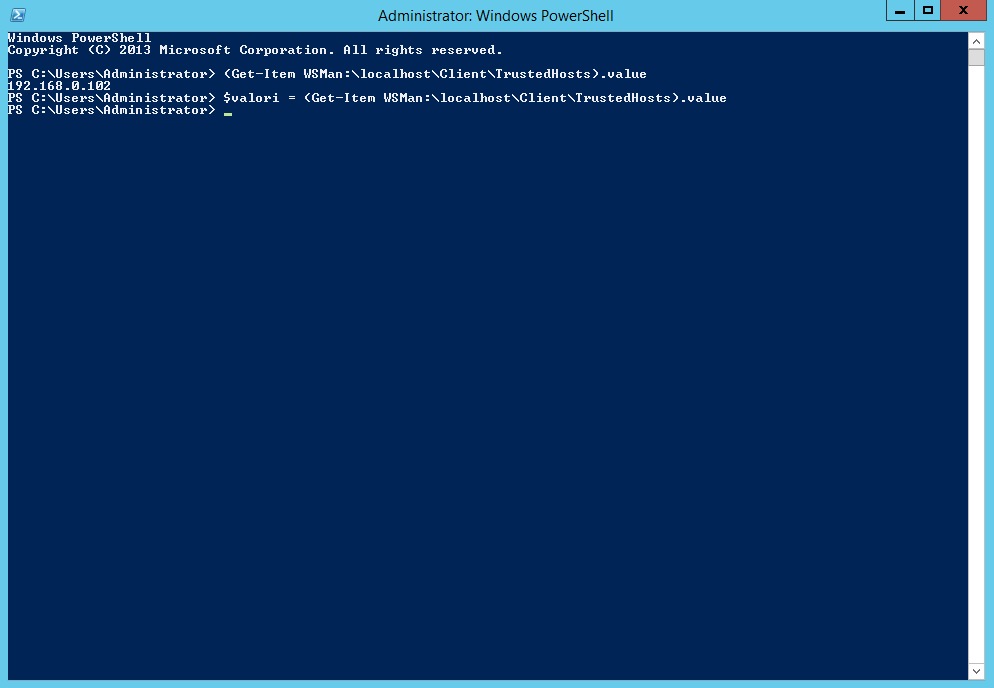
To add the server on which Exchange is installed to this list, we must first save the current list somewhere, by typing the following string:
$valori = (Get-Item WSMAN:\localhost\Client\TrustedHosts).value
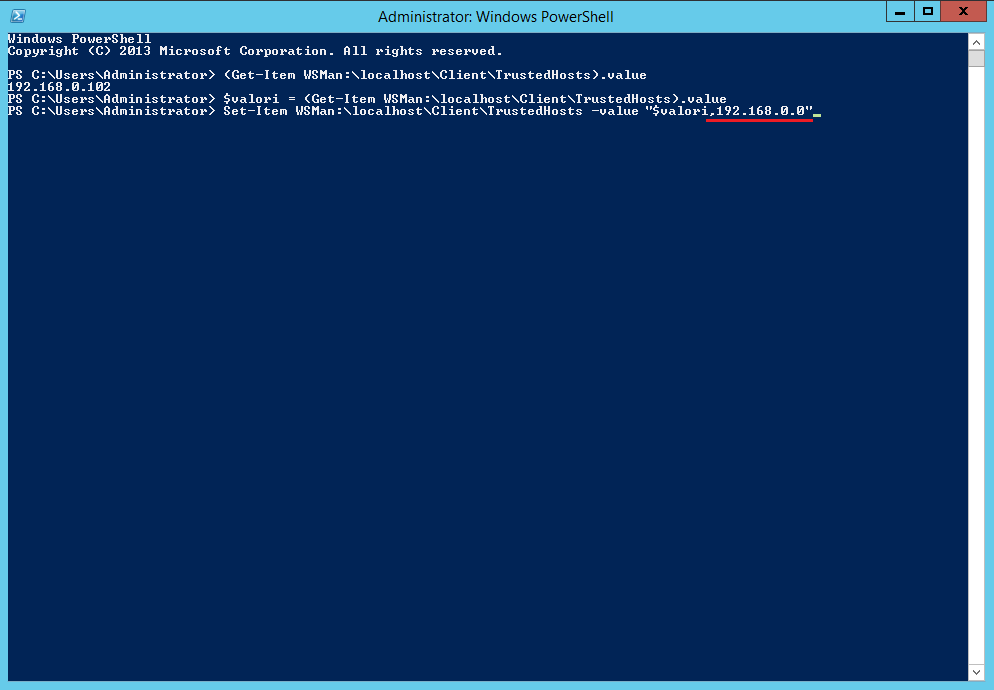
Now, we will add the IP of our server to the list, using the following code:
Set-Item WSMAN:\localhost\Client\TrustedHosts -value “$valori,IPSERVER”
Obviously, you must enter the IP address of your server in place of IPSERVER. In the below example, underlined in red, I have entered a generic IP for the purposes of this tutorial.
NB: IF THE LIST OF TRUSTED HOSTS IS EMPTY AFTER HAVING RUN THE ABOVE COMMANDS, IT IS NECESSARY RUN THE FOLLOWING COMMAND:
Set-Item WSMAN:\localhost\Client\TrustedHosts -value “IPSERVER”
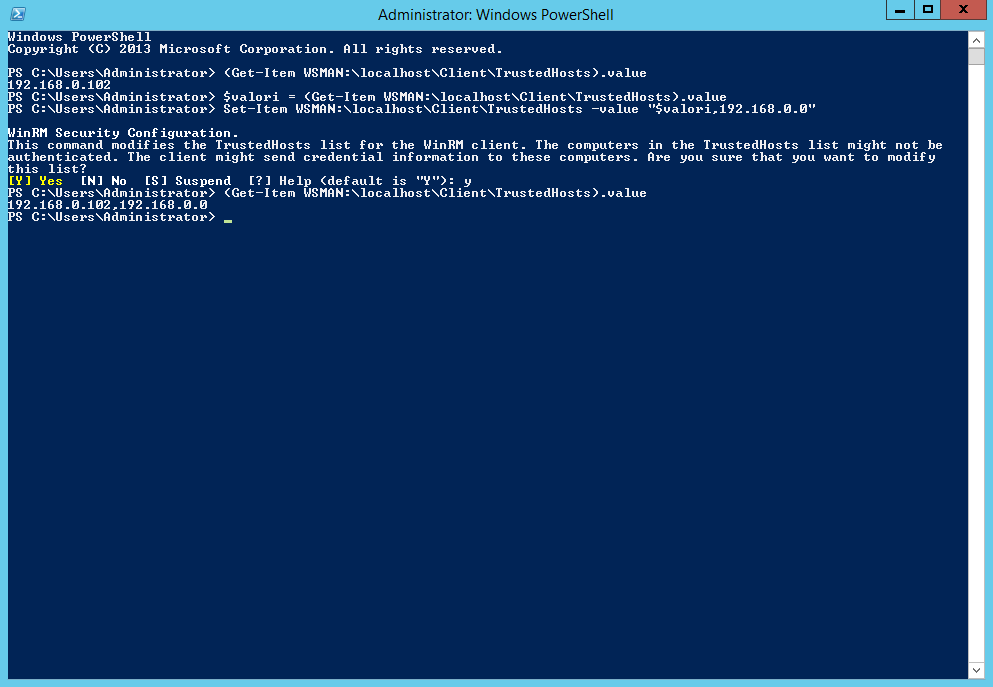
Now, Powershell will request confirmation by pressing Y (to accept) or N (to stop the operation). In our case, we will, of course, press Y.
We have now correctly added our server to the list of Trusted Hosts. To check if we have done everything correctly, we can simply re-type the command that displays the list of devices on the screen and check that our server is there: (Get-Item WSMAN:\localhost\Client\TrustedHosts).value
3) Launch and configure the WIN-RM service by enabling Powershell PS-REMOTING remote management
To open a backup and/or restore session with the Microsoft Exchange server, you need to launch and configure the Windows Remote (WIN-RM) service and enable Powershell (PS-REMOTING) remote management, in order to ensure that the PC performing the operation and the server are correctly connected.
To do this, you just need to implement the following code from the server Powershell: Enable-PSRemoting

To continue during the operation, just click “Y” to every one of the Powershell’s confirm requests, or “A” if you want to confirm all the operations at once.
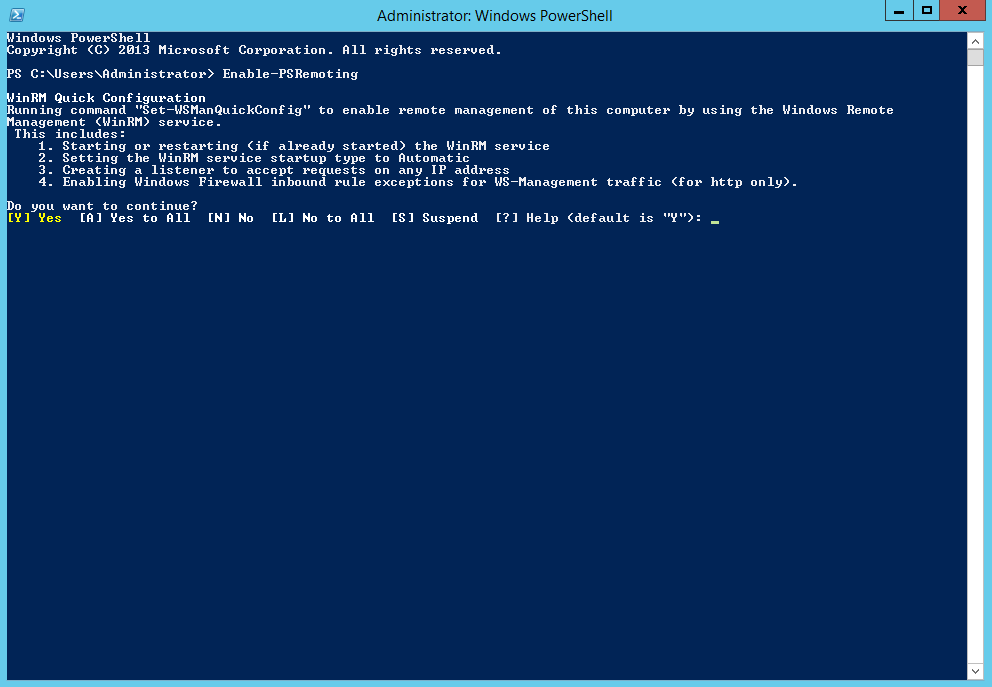
Once all the operations have ended, the service will have launched correctly and it will be possible to back up and/or restore the mailboxes locally and remotely, through Iperius Backup or code.
To view the tutorial on backing up Exchange mailboxes on .pst files through Iperius Backup, click on the following link:
https://www.iperiusbackup.net/en/backup-of-exchange-and-export-of-emails-as-pst-files/
To view the tutorial on the granular and multiple restore of Exchange mailboxes from .pst files through Iperius Backup, click on the following link:
https://www.iperiusbackup.net/en/restore-of-exchange-import-pst-files-into-mailboxes/
Amazing Tutorial!!
Many thanks