Microsoft SQL Server is a database plenty of features regarding replication, mirroring and failover clustering. All of them are strategies and configurations whose purpose is, with different ways of acting, to make data always available to client applications, in case of crashes and disservices, or simply to replicate data in more geographic locations to increase accessibility and availability performances.
In this tutorial we won’t talk about Failover Clustering or Availability Groups Always On, which both are database mirroring procedures with the main purpose of insuring the continuous availability of all services in a prompt way in case of disservices or server crashes. On the contrary, we will focus on the database replication procedures, that is, all those configurations that allow users to have all data being replicated on more SQL Servers, in an automatic and real-time way.
SQL Server provides 4 kinds of replication procedures:
- Transactional
- Merge
- Snapshot
- Peer to Peer
Peer-to-peer replication is a solution oriented to Horizontal scalability at high availability, as it allows to manage many copies of data in more instances of the server, called “nodes”. Based on transactional replication, Peer-to-peer replication propagates data changes to all the nodes and almost in real-time. Thanks to this redundancy, applications that request the horizontal scalability of reading operations can divide the clients reading processes to multiple nodes, e access data in a much faster way. This kind of replication is absolutely one of most performing and “crash-proof” replication procedures, as the lack of availability of one or more nodes does not affect the functioning and availability of the whole system itself.
However, Peer-to-peer replication is available only on SQL Server Enterprise version, with license costs that are obviously very expensive in relation to other versions. A good alternative choice, within reach of small and medium companies, and both stable and flexible to configure, is the Merge replication, that we’ll talk now about.
Let’s start immediately with the practice then, starting with what we need to configure a Merge replication and then how to setup it in a few simple steps.
Let’s consider 3 SQL Server 2014, being geographically distant and running on different networks. The final scheme we will obtain is the one shown on the picture below:
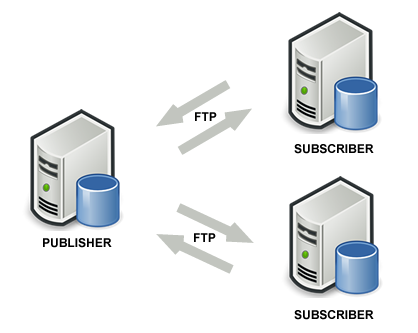
There must be a main primary server called Publisher, and secondary servers called Subscribers. Subscribers will synchronize their own data with the Publisher (sending and receiving) and, as a consequence of this, also data of each subscriber will be in sync with the others. Therefore, the first thing to do is to decide which of the three servers will act as Publisher e then proceed with its configuration, as explained below.
Firstly, let’s be sure that the SQL Server Agent service is started and set in automatic mode, otherwise let’s run it.
STEP 1: Create the Publication on the Publisher server
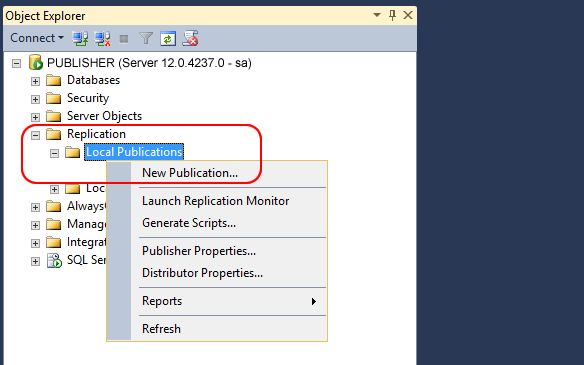
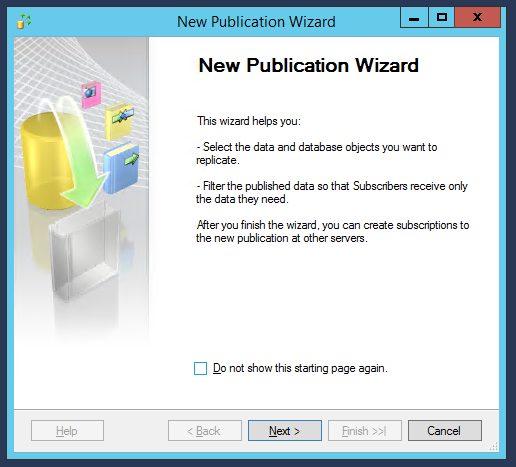
We will start to configure all the different options within the “New Publication Wizard” window. Now let’s go on straight to the first window:
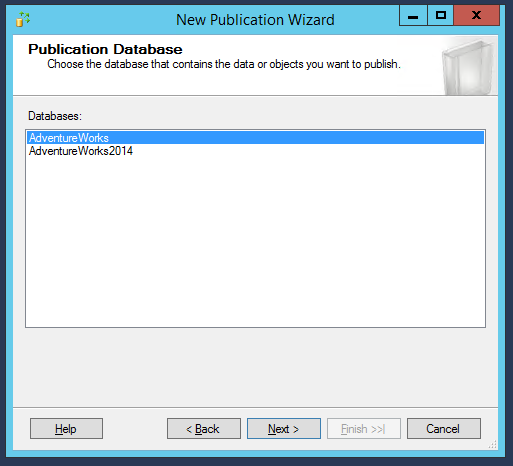
Now let’s select the database we want to synchronize:
Let’s choose then the type of replication we want to set up, that is the “Merge publication“:
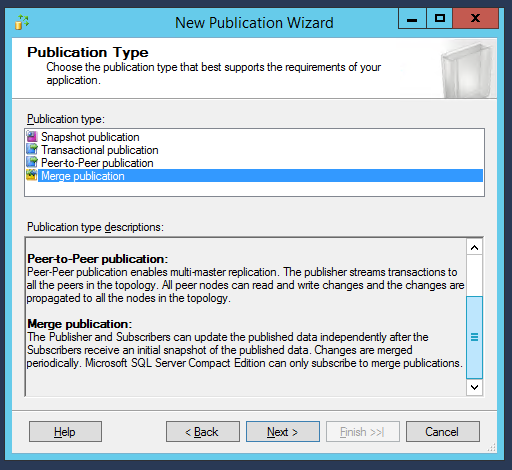
In the next window, we will keep the default compatibility options and just go on clicking on “Next”:

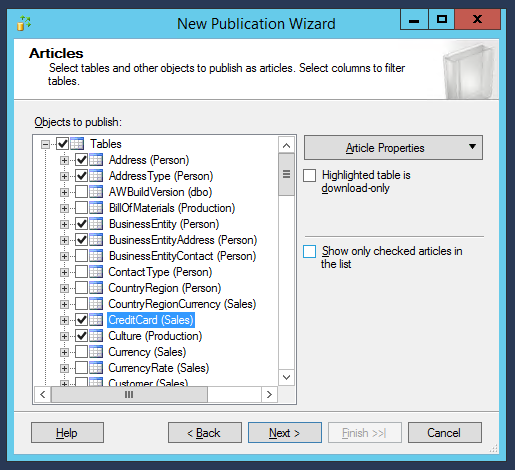
Now there is a very important step of our installation: choosing which database table we want to be synced up. Selecting them in very simple:
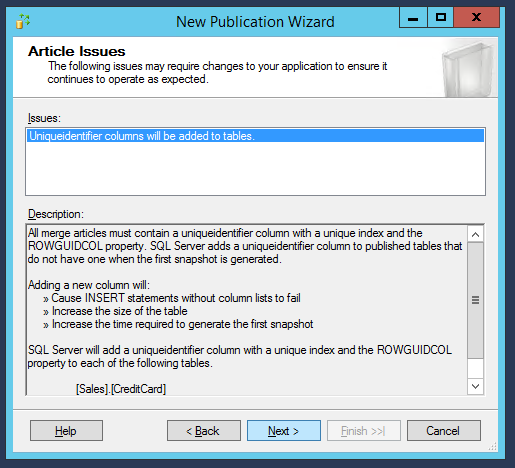
Proceeding to the next window, the wizard will warn us that a new ID field will be added to the selected tables to identify uniquely the records.
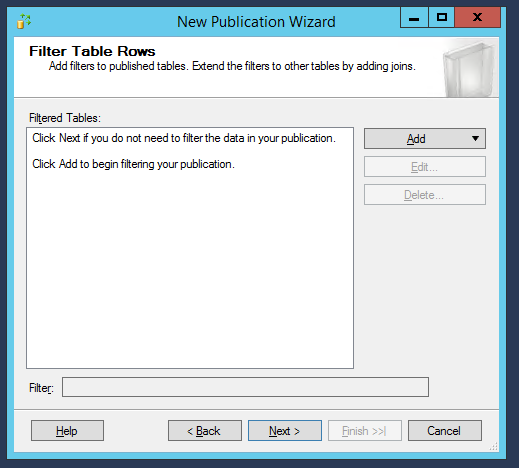
Let’s now go on to the next window, where we will be asked also if we want to add filters to the data that will be synced up. In this tutorial we won’t use any filters, so let’s just proceed clicking on “Next”:
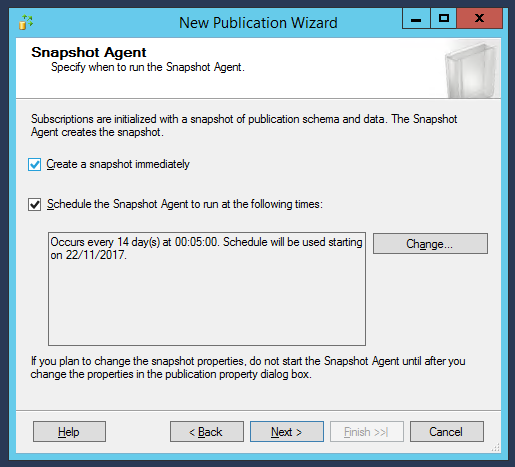
In the following windows, let’s keep checked both the options, as set by default, and then proceed:
Now there is another important step of our installation, that is the configuration of the accounts to run the replication service (agent) and connect to the Publisher, so, in this case, to itself.
In the rightmost window, let’s write the server Administrator username, putting the server or domain name in front of it. In this tutorial, let’s consider that the server name is “PUBLISHER”.
In the leftmost window instead, let’s put the SQL Server account, with whom it’s possible to connect to the database with maximum privileges. In this tutorial we used the default SQL user “sa”.
NB: the best thing to do is having the same SQL Server username and the same password on all the database server (both on publisher and subscribers).
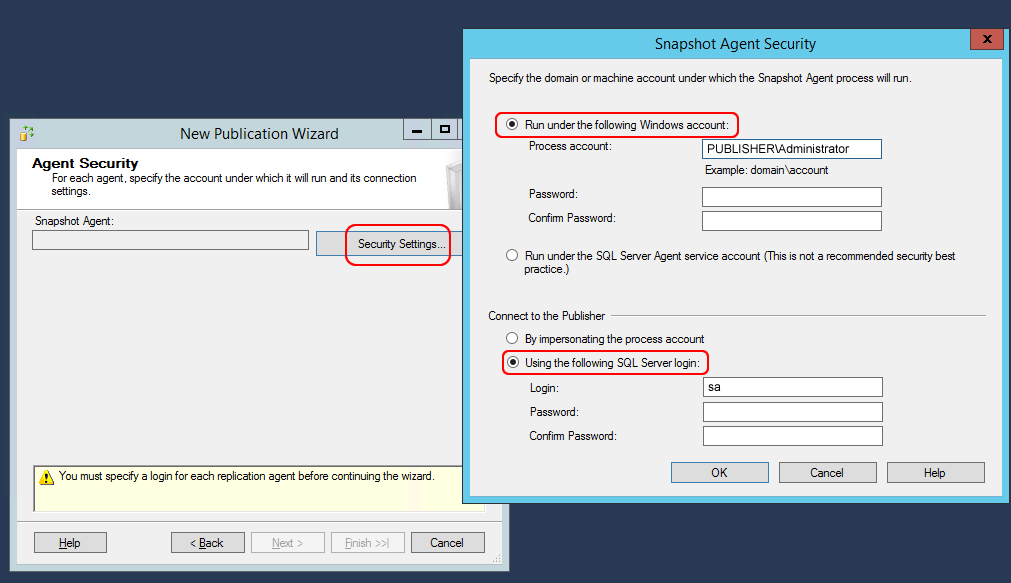
Let’s confirm all by clicking ok and let’s go to the next window.
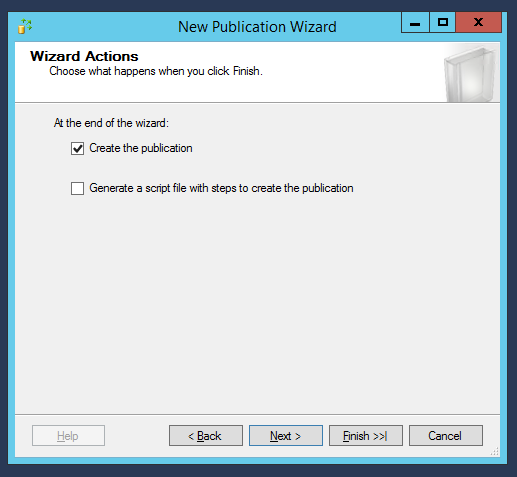
In the following window, we will keep checked the option “Create the publication” and click on “Next”:
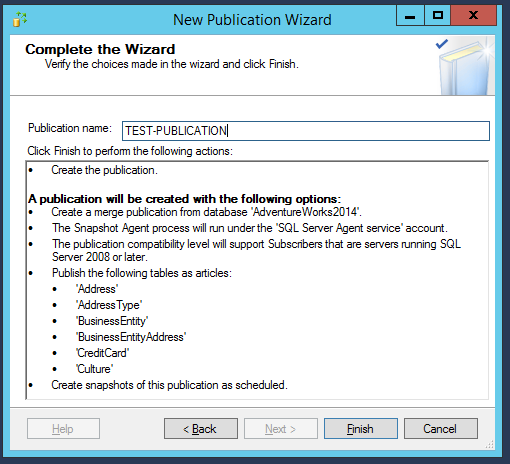
Finally, the summary of all the settings will be shown and we can now create the publication by clicking on “Finish”:
A new window will be opened, showing the progress of the initial snapshot, and both the operations must complete correctly.
STEP 2: Configure how the Publisher server allow subscribers to access published data: FTP Server
One of the most fundamental replication settings is how the subscribers can access to data “published” by the Publisher server. Physically speaking, the Publisher periodically creates a snapshot of its data in a local folder, and then update it with data changes. Therefore, we must ensure that subscribers can have full access to this snapshot, so that they can synchronize their data with the publisher. Since in our tutorial we are talking about remote servers (therefore not inside the same LAN), the way we’ve chosen to make data avalaible to subscribers is the FTP (as it would be impossible to use a simple folder shared over the network).
Then, we have to configure on the publisher a FTP server that makes remotely available, for the subscribers, the folder where the data snapshot stays. We can use both the FTP server of IIS, that is the Windows default one, and a third-party one, like FileZilla Server. For the FTP configuration inside IIS, please refer to the official Microsoft guide https://technet.microsoft.com/it-it/library/hh831655(v=ws.11).aspx .
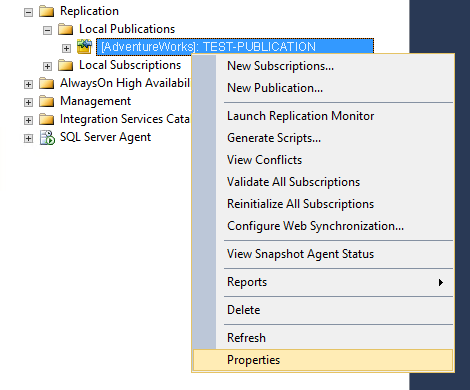
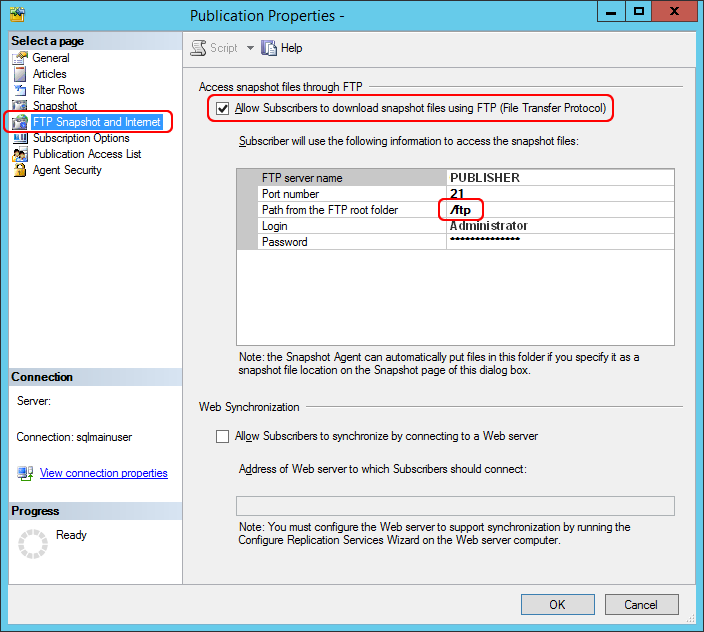
Firstly, we have to make a change at the publication we’ve just created, in order to enable FTP as access method to the published data:
Let’s set up then the connection configuration (settings must reflect the configuration of the FTP server). Let’s write the FTP server name (the same as the server name itself), the port (21 the default one, but due to security reasons we could also specify a different one), the FTP username and password (if we’re using IIS, we’ll choose a Windows username, ensuring that it’s an administrator; on the contrary if we’re using another FTP server, let’s use the user we configured inside it). Finally, let’s specify the relative path of the folder that contains the snapshot, considering it as starting from the root of FTP server. When setting up this procedure, SQL Server creates (by default) a folder called “ftp” (with the data snapshot inside) in the path “C:\Program Files\Microsoft SQL Server\MSSQL12.MSSQLSERVER\MSSQL\repldata”. This path must be configured as root of FTP server and, therefore, the relative path to set inside this window will be “/ftp”, as shown in the following picture.
N.B.: it will be necessary to open the FTP port using a specific rule on the Windows firewall of the Publisher server. In addition, if connection errors should occur despite the correct firewall configuration on the Publisher, this could also be due to the Subscriber firewall. To verify this, try disabling the Subscriber firewall completely and then retrying the synchronization. Subsequently, you can turn on the firewall again and eventually add the appropriate rules.
N.B. 2: an error in the synchronization (on the subscriber) could mean that this FTP configuration was not done correctly. The subscriber, when accessing the data, could encounter a generic error, leading to an abnormal interruption of the synchronization agent/job (errors like “the agent is not running”, or crashes along with memory dumps). In these situations, don’t let us be misled by error messages, that could refer to completely different problems, but let’s check again this configuration. A first test could be to connect from the remote server (a subscriber) with any other FTP client software, like FileZilla, to be sure that connection is OK and the folders are accessible.
N.B. 3: the folder “C:\Program Files\Microsoft SQL Server\MSSQL12.MSSQLSERVER\MSSQL\repldata” and its relative subfolder “/ftp” may not be accessible because of permissions problems. In case of problems that seem not easily recognisable, let’s do immediately a test setting the permissions of this folder to “Everyone” -> “Full Control”.
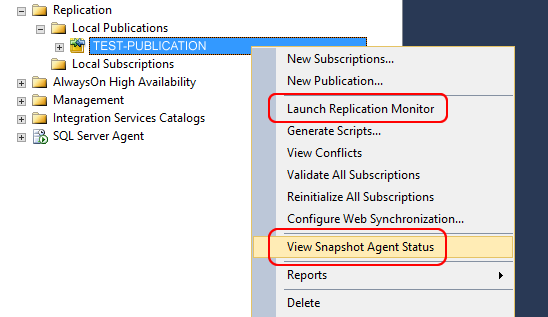
Now, all the configurations have been performed. Let’s check with “View snapshot agent status” that the snapshots are correctly made and with “Launch replication monitor” to see if the subscribers are syncing up correctly (until we don’t set up a subscriber, it will remain empty).
If on the Publisher all is configured correctly, let’s now set up a subscriber, and then perform the first data synchronization.
STEP 3: Create the subscription on the Subscribers
Prerequisite: let’s make sure that the SQL Server Agent service is running on the subscribers.
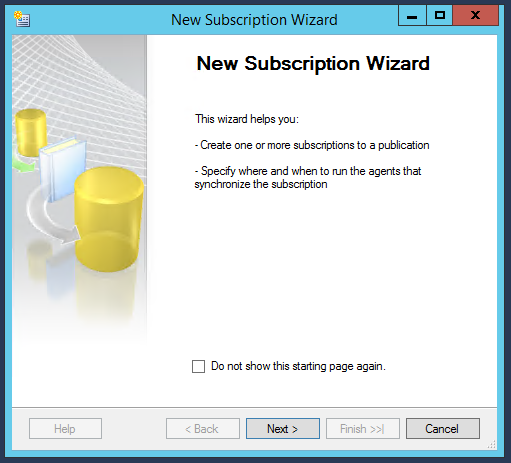
Let’s now go onto the SQL Server that will connect to the main server as a subscriber and then synchronize the data. Inside the “Replication” menu, let’s right-click on “Local Subscriptions” and then on “New Subscriptions”.
As for the publication, a wizard page will prompt:
In the following window, we have to connect to the Publisher server in order to see and select its publication (the one we made before):
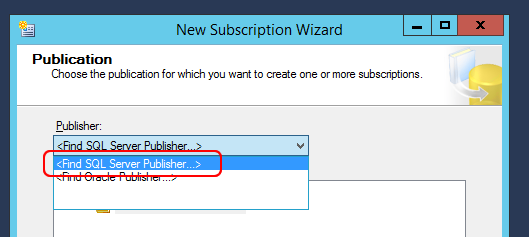
Here are some fundamental configuration steps to make in order to ensure a correct connection. Infatti, when searching for a Publisher, we can connect to it just specifying the name of the server, but not the IP address (with or without a specific port). This means that, on this system, we have to “map” somehow the IP address of publisher server using its name. We can do this by creating an Alias withing the configuration window SQL Server services, as shown in the picture below:
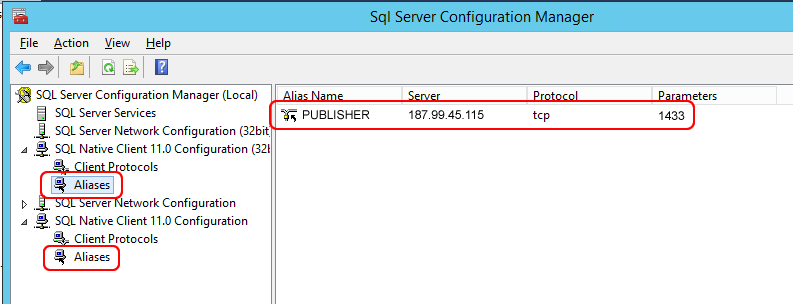
Let’s add an alias with the name of the Publisher remote server, its IP address and the SQL Server port, in both the “Aliases” branches.
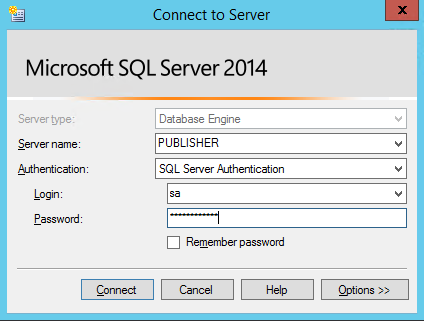
This will allow to connect to remote SQL servers just using names and not IP addresses. It’s fundamental to open the SQL Server port (here we can see the default one) on the servers. When clicking on “Find SQL Server Publisher”, we will be asked to connect to SQL publisher server, then the standard authentication window of SQL Server will prompt:
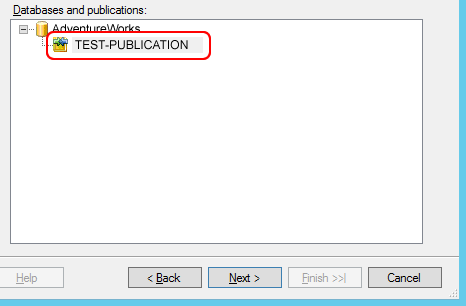
Once authenticated, we will able to see the publication we’ve created on the publisher, then select it and go on:
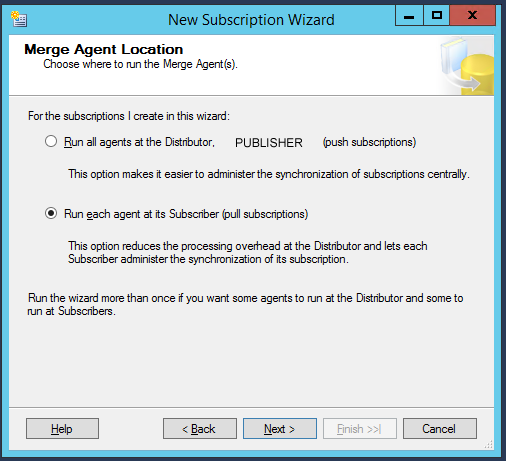
Let’s go to the next step and keep the default options:
In the following window, let’s select the database to synchronize. We can create this database on the subscriber just restoring a copy of the main database we have on the publisher.
As shown in the picture, there are both the subscriber server name (we have called it “SUBSCRIBER” in this example) and the name of the database.
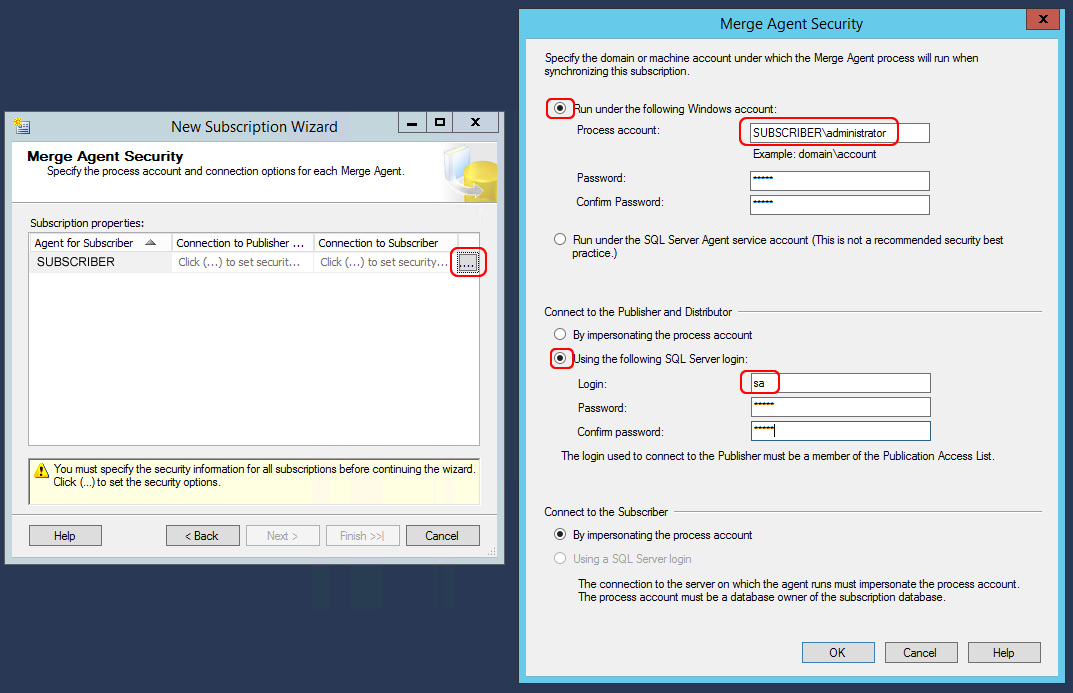
Subsequently, let’s set the credentials needed for authentication. We will use the Windows Administrator account in the first panel, and the SQL Server account in the second one (as we did before with the publisher).
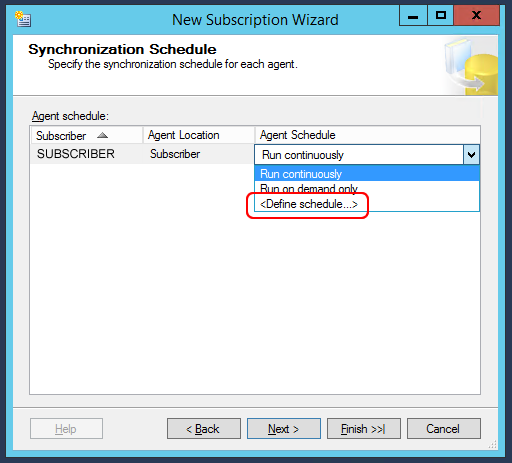
Let’s go to the next step, that consists in setting WHEN to execute data synchronization. It’s possible to configure it in realtime (continous synchronization) or schedule it by defining a time interval. It’s just a standard Windows scheduling. If we need data to be continously synced, we can also choose a 10 seconds interval. Otherwise a minutes/hours/days interval will be good as well.
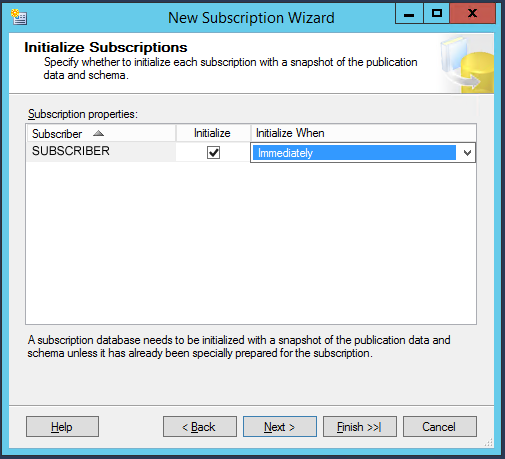
In the following window, let’s set the subscription to be initialized immediately:
Finally, let’s configure the subscriber to run also in server mode: this means that the subscriber will not only retrieve the data from the publisher, but will also send its own data to it, implying a bidirectional synchronization. Let’s keep the default option for the conflict resolution priority:

Let’s go then to the last window and click on “Finish” to create the subscription and start the synchronization:

Let’s check if the synchronization is working correctly just by opening the synchronization status window (see picture below):
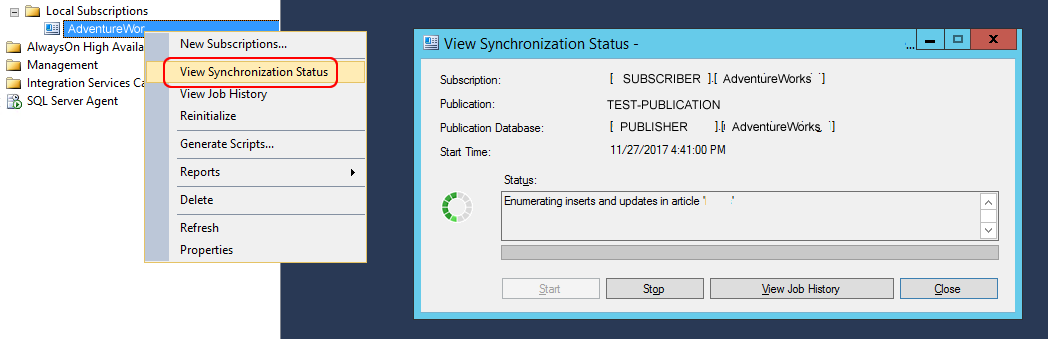
Synchronization is correctly running!
Following exactly all the steps of this tutorial, we have correctly configuted a data synchronization between two (or more) remote SQL Server without any problems.
Clearly, it’s possible to encounter some errors due to the articulated procedure, but with some little tricks it’s possible to realize a very stable and efficient configuration.
On the Microsoft website we can find a lot of documentation on how to optimize and configure the database replication:
PLEASE NOTE: if you need technical support or have any sales or technical question, don't use comments. Instead open a TICKET here: https://www.iperiusbackup.com/contact.aspx
**********************************************************************************
PLEASE NOTE: if you need technical support or have any sales or technical question, don't use comments. Instead open a TICKET here: https://www.iperiusbackup.com/contact.aspx
*****************************************