Iperius allows easy and immediate restoration of the backup files, implementing restore functions ranging from granular backup (restoring individual .pst files on any mailbox server) to total backup (restoring multiple mailboxes based on .pst files created by previous backups).
Now we will see how to use the .pst files (created from previous backups) for restore within a single mailbox or mailbox groups associated with a multiple backup previously made by Iperius.
NB: Before making a backup through Iperius, make sure you have followed our tutorial to configure all the permissions needed to perform the operation:
https://www.iperiusbackup.net/en/configure-exchange-permissions-backup-export-restore-mailboxes/
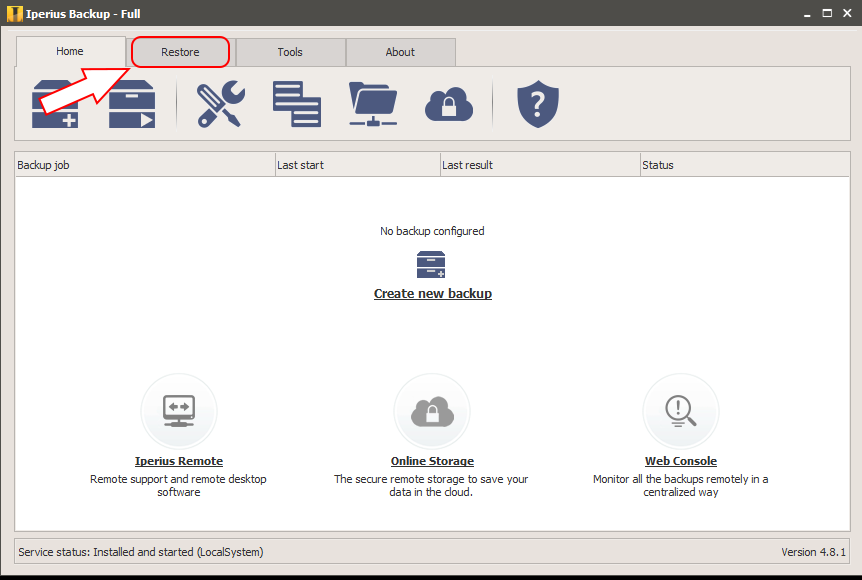
In the main Iperius window, click on the “Restore” tab.
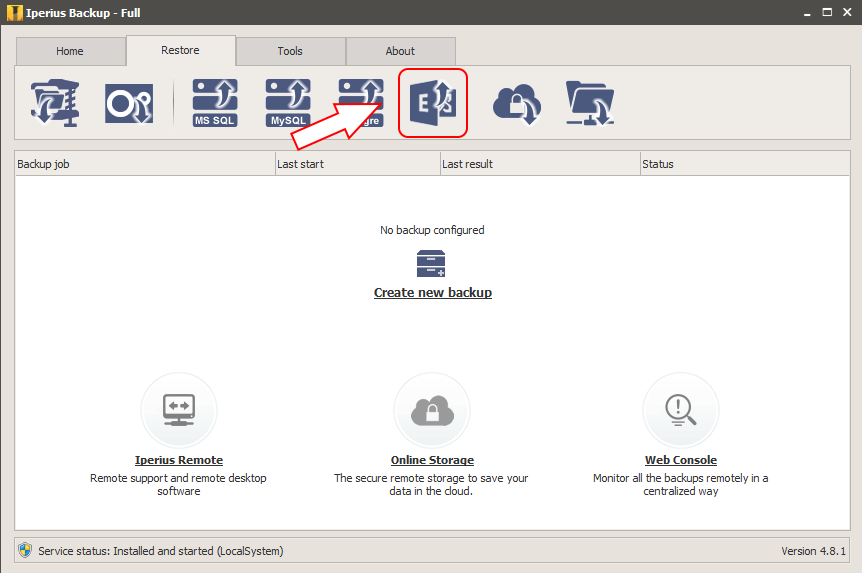
Now, click the Exchange icon (see image below) to set up an operation of type of restore of Microsoft Exchange.
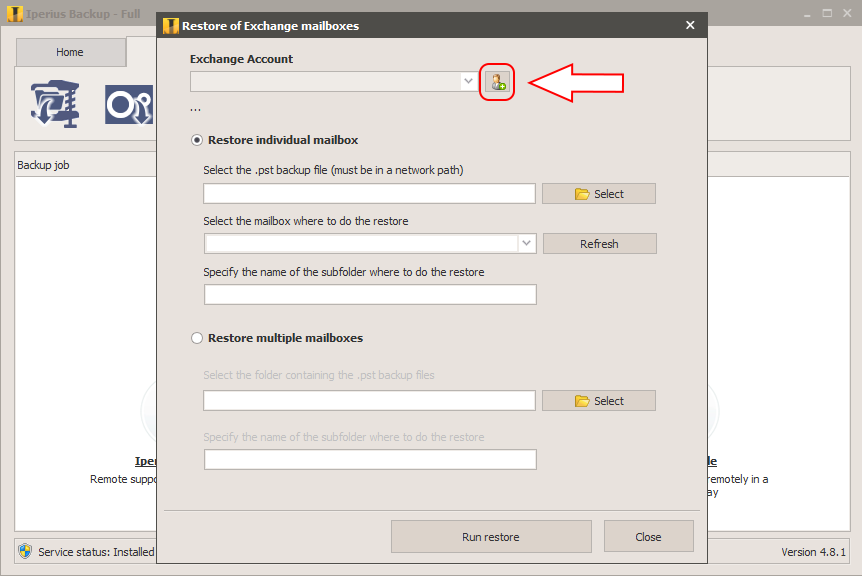
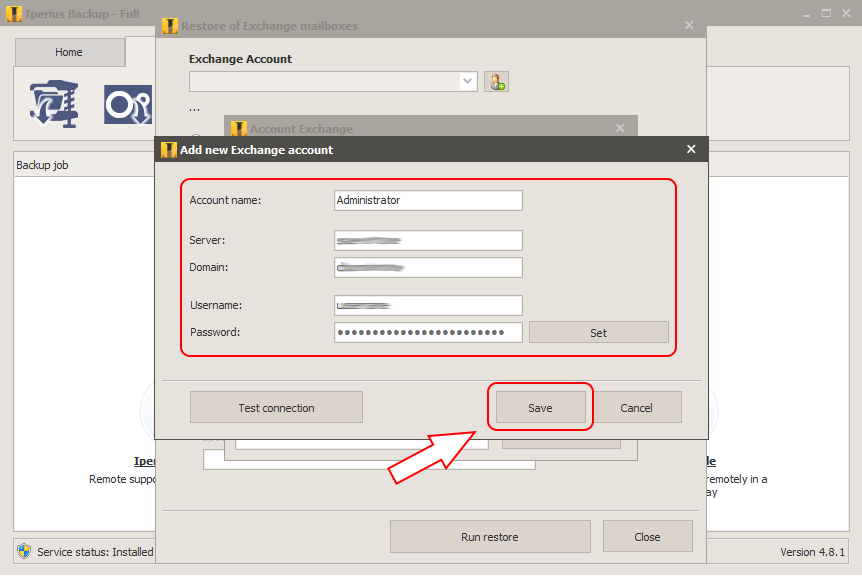
You will now open a window where you can set your restore of Exchange as you prefer. The first thing to do is add your Exchange account (compulsory with permission from an administrator!) so that Iperius has the necessary permissions to create the restore operation. To do so, just click on the icon shown in the image below.
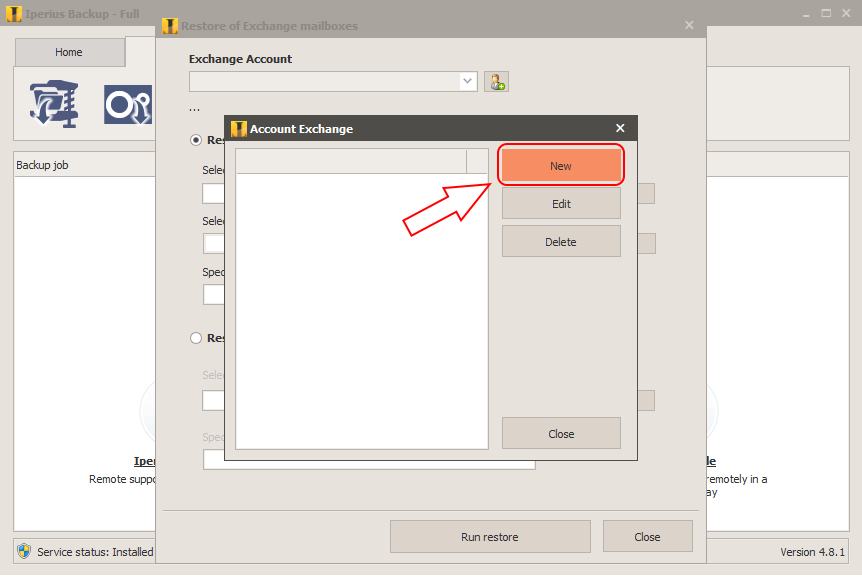
This will open another window where you can add your account by clicking on the “New” button or modify an existing one by selecting it from the list and clicking the “Edit” button.
In the next window you have to add, in addition to the credentials (username and password) of your Exchange account, even the server and domain names, as well as a name for the account that you are creating (or editing). Once all information has been entered, you can click on the “Ok” button to return to the previous menu, or to verify that the credentials are correct and the permissions required to perform the data read and restore operations, it is recommended to click “Test Connection”.
At this point, after returning to the main restore window, see how to make the two different types of Iperius backup offered to users.
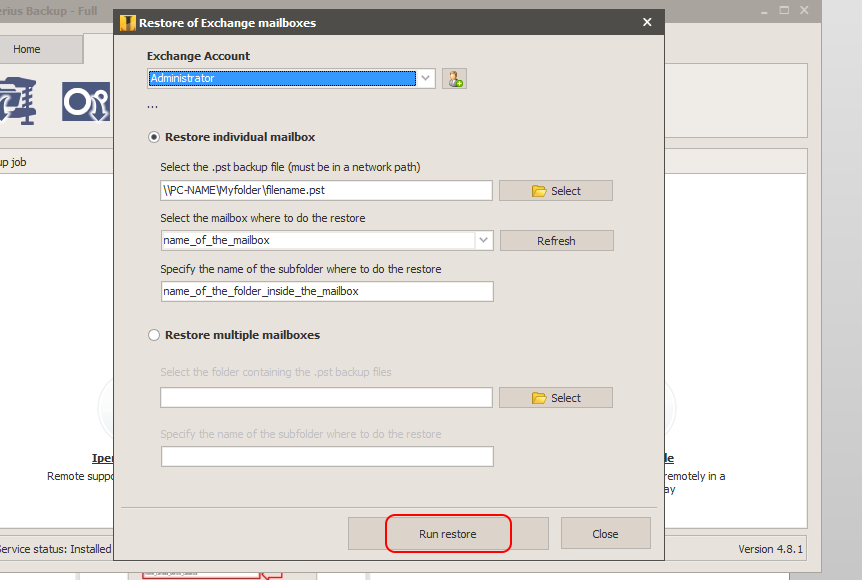
We start from the first case, or the “Restore to a single mailbox.”
Tick the checkbox for this recovery mode, simply enter the three entries present to set the restore function according to your preferences:
1) the path of the .pst file you want to restore into the mailbox (written in UNC format, namely as the network path, also in the case where it is found locally, i.e. on the same PC from which Iperius is being run). Important requirement for doing so is that the EXCHANGE TRUSTED SUBSYSTEM service has read permissions on this folder (to set it, just click on the folder sharing settings);
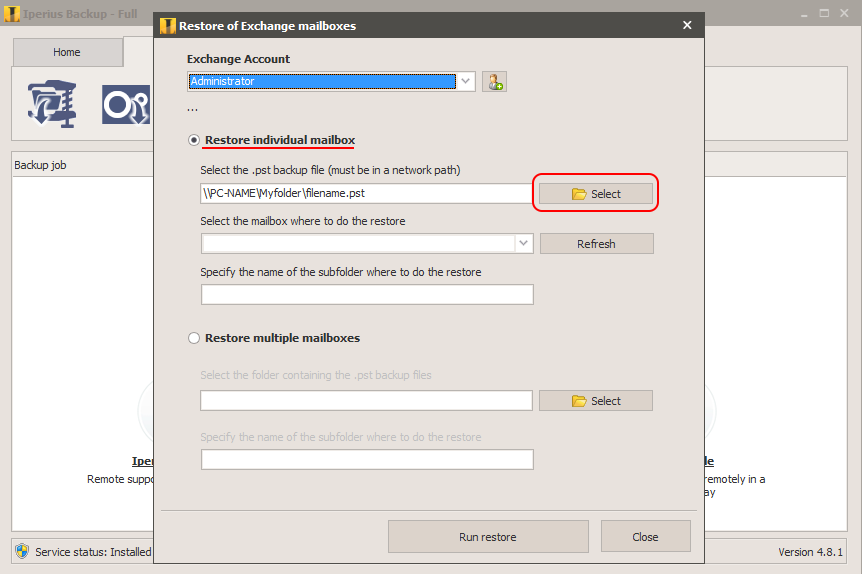
2) The name of the mailbox to which you will import the .pst file. As you can see, once you select the pst, this field will automatically be filled with the same name as this file, but you can easily change it by clicking the “Update” button and selecting any of the folders on the server;
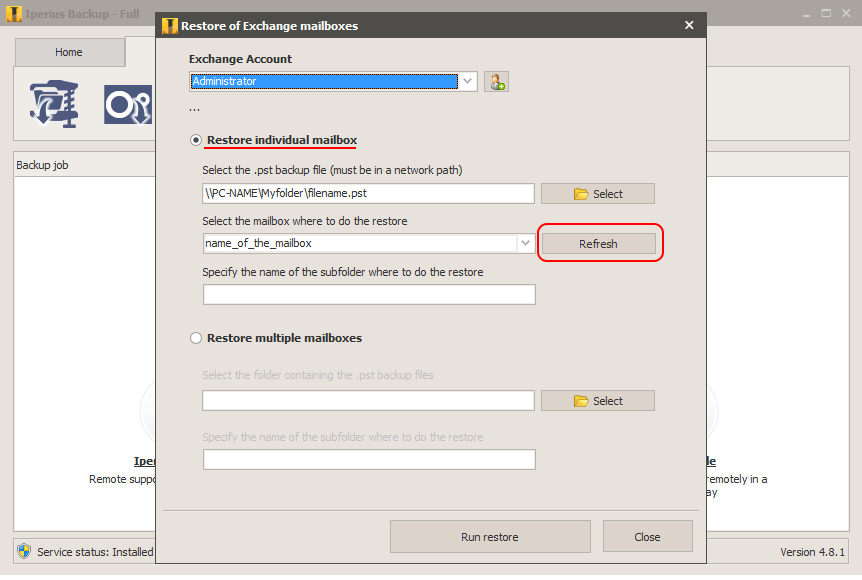
3) The name of the folder (inside the mailbox) where you will find the imported files through the PST, you may notice that when you execute the access to the mailbox selected as the restore destination;
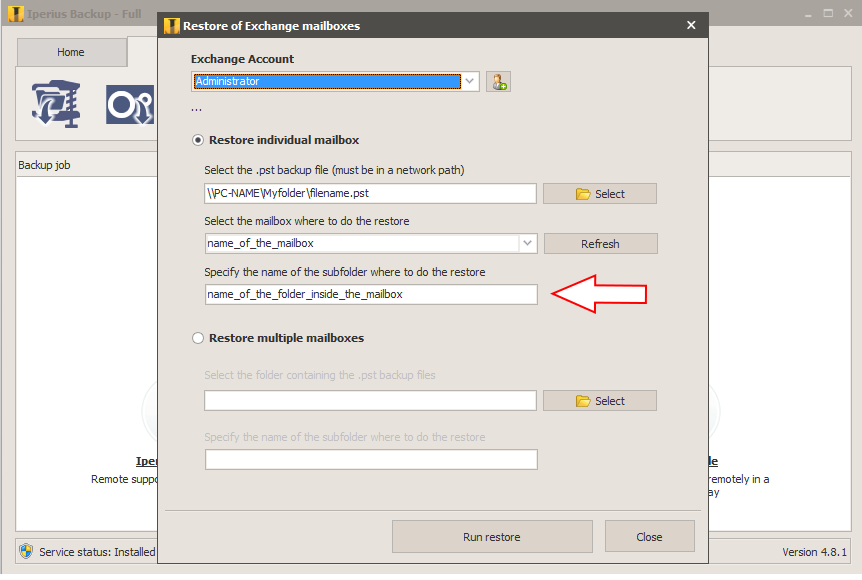
At this point, once you set everything up, just click on “Run Restore” to start the process. This will open an Iperius dialogue which will show the progress of the operation on the screen along with any errors.
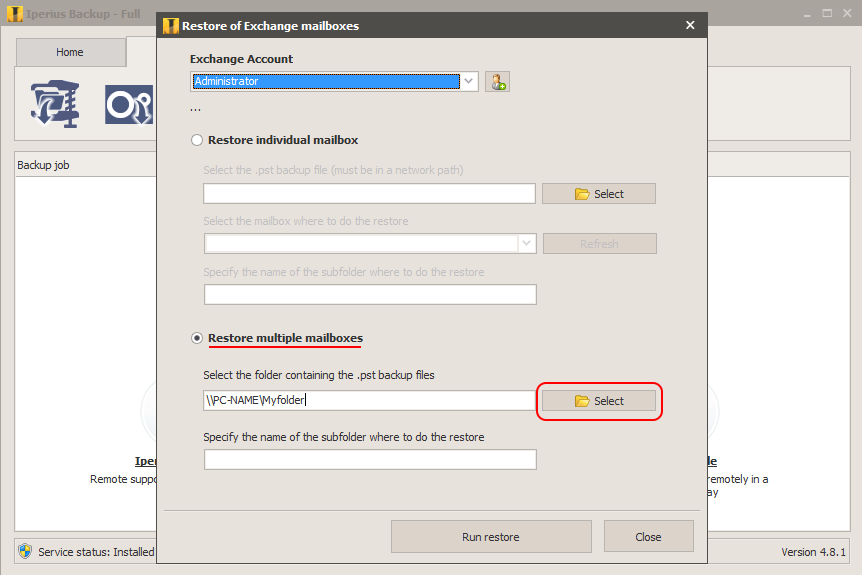
Now for the second type of Exchange restore offered by Iperius, or the “Restore to multiple mailboxes.”
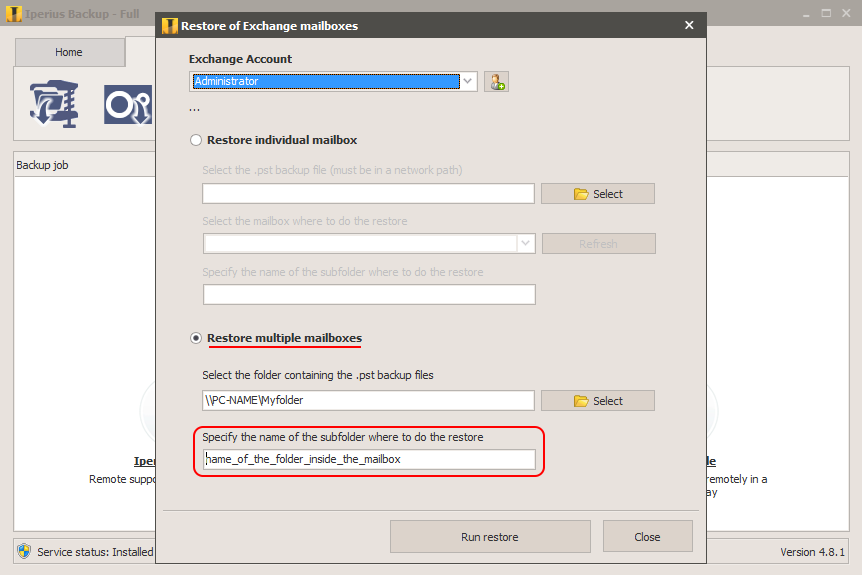
This action, once initiated by the user in the folder that contains the .pst file and the name of the folder (inside the mailbox) in which it will be imported, links each .pst to Exchange mailbox that has the same name, allowing the recovery of each mailbox without importing additional or extraneous messages into it.
The procedure is simple and fast as in the previous case. After setting the Exchange account, just tick the “Restore multiple mailboxes” to select this type of operation.
Then select via the appropriate icon (circled in the picture below) the folder containing the .pst file to be restored.
One can also manually enter it by writing it in UNC format, that is, as a network path, also in the case in which it is kept locally, i.e. in the same PC from which Iperius is run). Important requirement for doing so is that the EXCHANGE TRUSTED SUBSYSTEM service has read permissions on this folder (to set it, just click on the folder sharing settings);
Now just enter the name of the internal folder to the mailbox (which will be the same for all the boxes that will be restored) in which it will import these messages in .pst data input file.
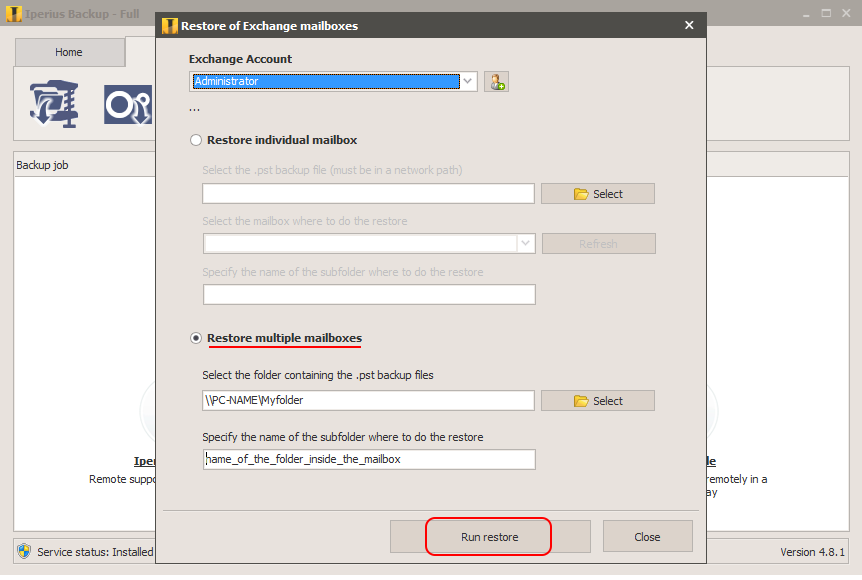
Set everything up, just click on the “Run restore” button to start the process. This will open an Iperius dialogue which will show the progress of the operation on the screen along with any errors.
To read our tutorial dedicated to the Exchange Backup and export of emails in .pst files with Iperius backup, just click on the following link:
https://www.iperiusbackup.net/backup-exchange-esportazione-email-pst-software-iperius-backup/
PLEASE NOTE: if you need technical support or have any sales or technical question, don't use comments. Instead open a TICKET here: https://www.iperiusbackup.com/contact.aspx
**********************************************************************************
PLEASE NOTE: if you need technical support or have any sales or technical question, don't use comments. Instead open a TICKET here: https://www.iperiusbackup.com/contact.aspx
*****************************************