Among the most powerful features of Iperius Backup is definitely the drive image and disk cloning function, which can also be perfectly used to virtualize physical machines (Physical To Virtual, P2V).
Since version 8.2.0 of Iperius, the possibility to perform incremental drive image has been introduced, so the user can choose whether to perform a patching of the previous image, create a number of incremental or differential folders after the first full image backup, or perform only full copies.
In this tutorial, we will see in detail how to use these new features, both for the purpose of performing drive image backups of workstations and servers and for cloning entire disks or virtualizing Windows operating systems to start them directly inside Hyper-V (or convert them for VMware ESXi with VMware Converter). This type of backup allows what can be defined as an “instant restore“, precisely because of the possibility of attaching the cloned disk (.VHD or .VHDX) to a Hyper-V virtual machine and immediately starting the system.
Iperius drive image obviously allows restoring the backup even on different hardware, is compatible with RAID disks, and with any Windows operating system (7, 8, Windows 10, Windows 11, Server 2008/R2, Server 2012/R2, Server 2016, Server 2019, and Server 2022).
Finally, you can easily create your own “recovery disk” (on a USB stick or on an .ISO file to burn) directly from a convenient interface within the program, to boot on a machine and perform the bare-metal restore (disaster recovery).
But let’s see in detail how to perform an Iperius Drive Image, saving the Windows 11 system disk to a .VHDX file.
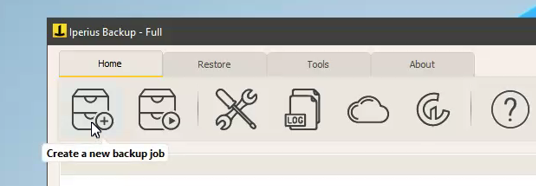
First, let’s create a new backup operation:
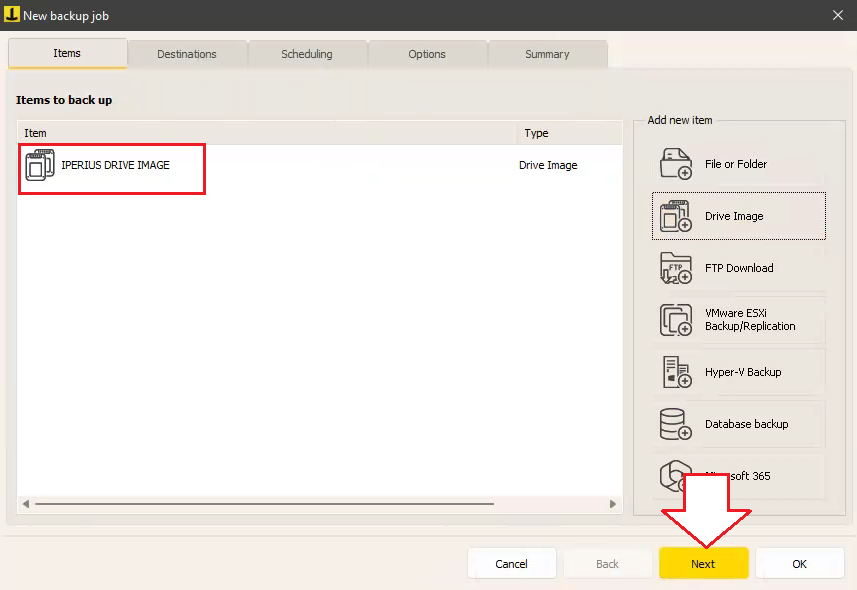
Now let’s add a new element to the backup, which is the Iperius drive image, as shown in the figure below:
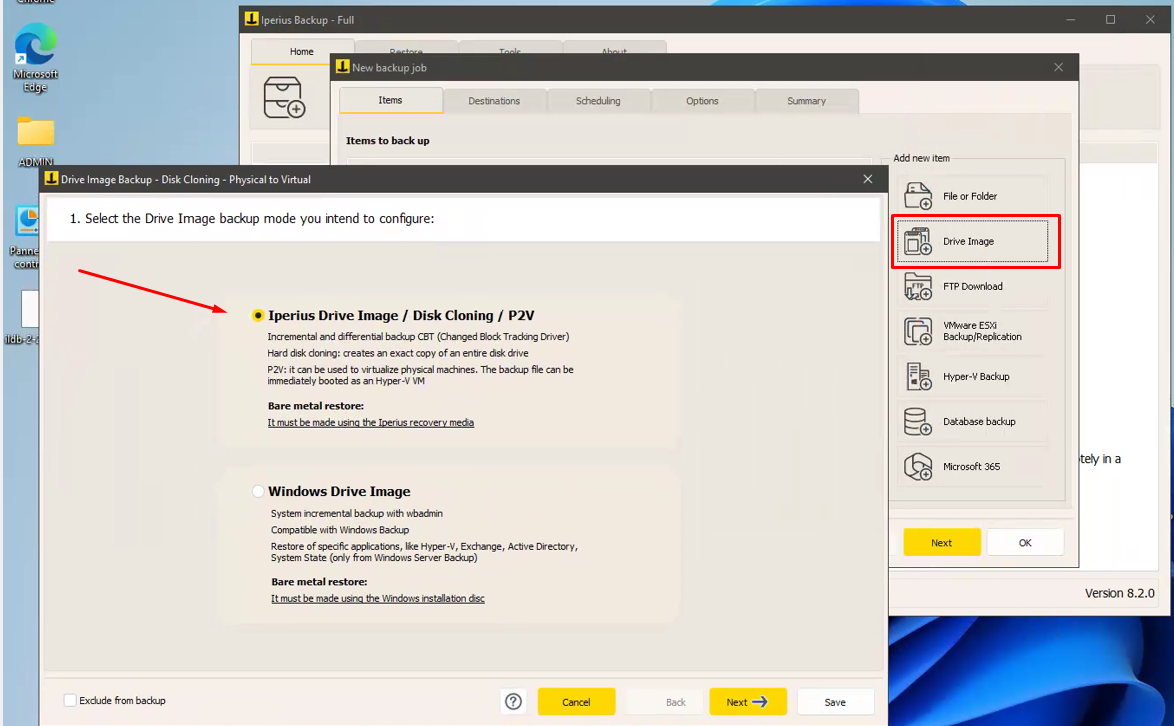
Note: Iperius allows you to perform two different types of drive image backup, as you can see in the menu in the figure. The item regarding “Windows Image Backup” allows you to create a drive image backup using the same methodologies as the Windows image backup (wbadmin), thus obtaining a backup that can be restored with the Windows installation disk and that, in the case of servers, also allows restoring an active system such as Active Directory, Exchange, Hyper-V (the so-called applications) through Windows Server Backup.
The Drive Image we are talking about in this tutorial, on the other hand, has several advanced features, making it an efficient and useful tool in many cases. Although the file image format is always VHD/VHDX, to maintain maximum compatibility, this backup performs a real disk cloning, including their boot information in the case of system disks. In this way, Iperius can be used to perform physical machine virtualizations (simply by connecting the VHD/VHDX file on Hyper-V) and instant-restore by immediately starting the system as a Hyper-V virtual machine.
Finally, with Iperius Drive Image, it is possible to restore an entire system on a physical machine (even with different hardware) using the Iperius recovery disk (you can create the recovery disk directly from within Iperius), without the need for the Windows installation disk. The boot will be performed through the Iperius Recovery Environment®, which will easily allow you to perform a re-imaging of a disk, i.e., a bare-metal recovery, in just a few clicks.
Let’s choose Iperius drive image and select the disks:
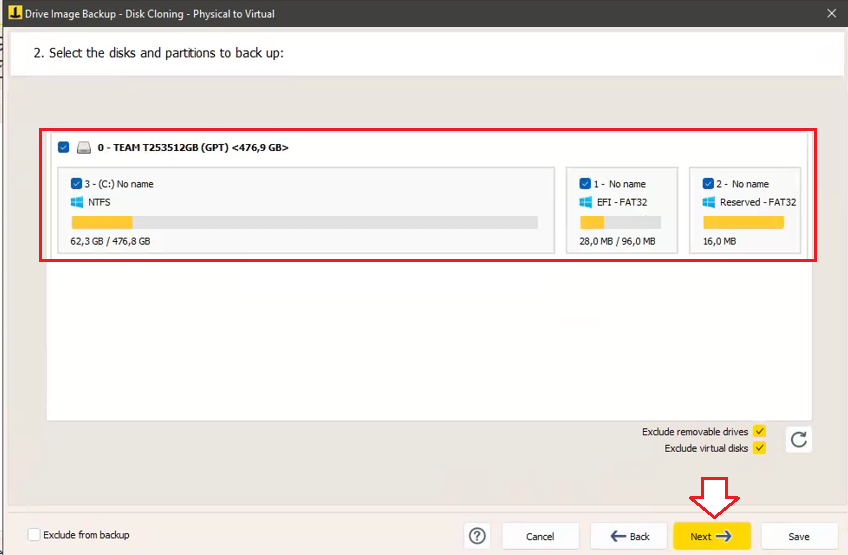
Iperius will show us which disk contains the system partitions, indicated by the Windows symbol. When we select a partition that contains the operating system, in the example in the figure C:, all other system partitions of that disk will be automatically selected. This is necessary to have a perfectly consistent backup and a restorable system. The entire disk will be saved as a .VHD or .VHDX file, depending on the operating system version. Clearly, we can also select other disks/partitions, for which other image files will be created.
Let’s move on in the configuration and get to the choice of destination and the type of backup to apply.
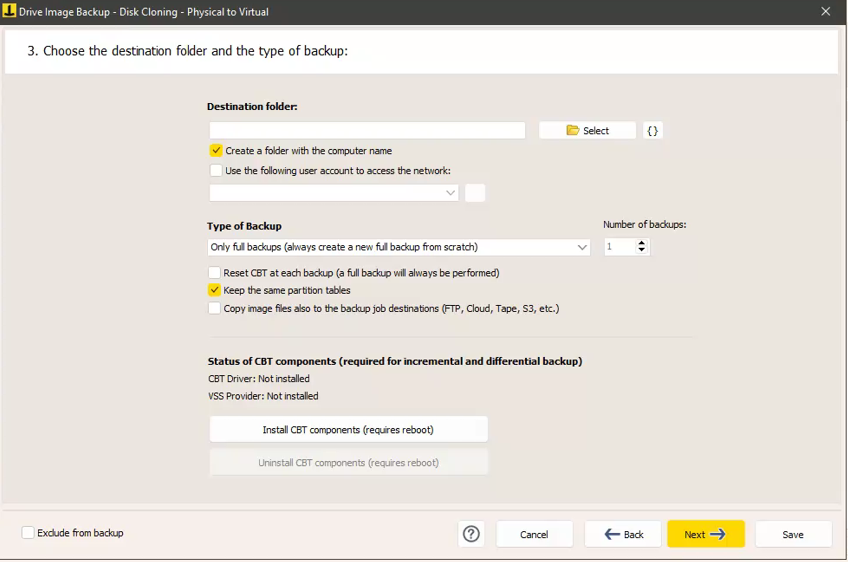
Let’s specify the destination path; in the case of a network path, such as a NAS, it is generally necessary to also enter credentials for network authentication.
You can also check the option “Copy the image files also to the destinations of the backup operation (FTP, Cloud, Tape, S3, etc.)” so that the image backup, once saved in the specified destination, will be copied to the additional destinations possibly specified for this backup operation (next screen, “Destinations” panel). For example, we might want to make an additional copy of this image backup to Amazon S3 or an FTP server, in which case we will check this option and then specify an S3 or FTP destination in the subsequent “Destinations” panel.
The Backup Types available are:
- Only full backups: Iperius will perform a new Full from scratch each time, overwriting the previous one.
- A full backup (Full) updated each time with differences: Iperius will perform a patching of the image, i.e., after the first Full copy, it will update the same backup image with differences with each new execution.
- A full backup (Full) + Incremental: Iperius creates a first Full copy and a number N (to be defined in “Number of copies”) of incremental copies where it will save the differences from the previous backup.
- A full backup (Full) + Differential: Iperius creates a first Full copy and a number N (to be defined in “Number of copies”) of differential copies where it will save the differences from the Full backup.
If we choose, as Backup Type, “Only full backups“, we can directly move on to the Summary.
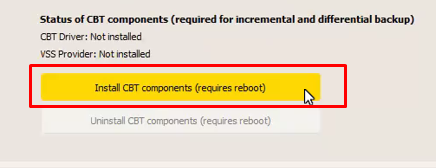
Otherwise, for all other backup types, it is necessary to install the CBT components required to perform incremental drive images.
We will be asked to restart the computer but this operation is only required once.
The steps are very simple:
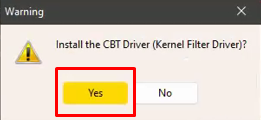
Let’s wait a few seconds, and we will be asked to restart the computer for the driver installation to complete correctly
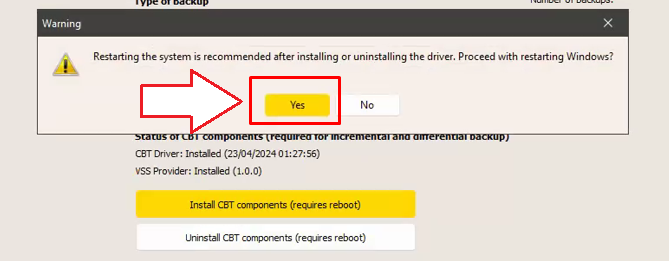
Once the computer is restarted, if the drivers have been installed correctly, we will have this screen:

Let’s choose, for example, a local backup as the destination and the incremental backup type with 3 copies.
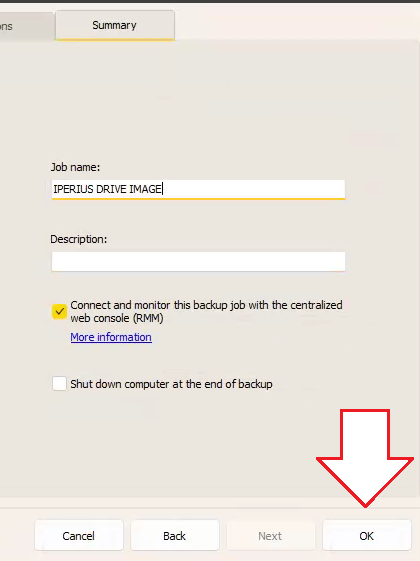
Let’s move on to the Order Summary:
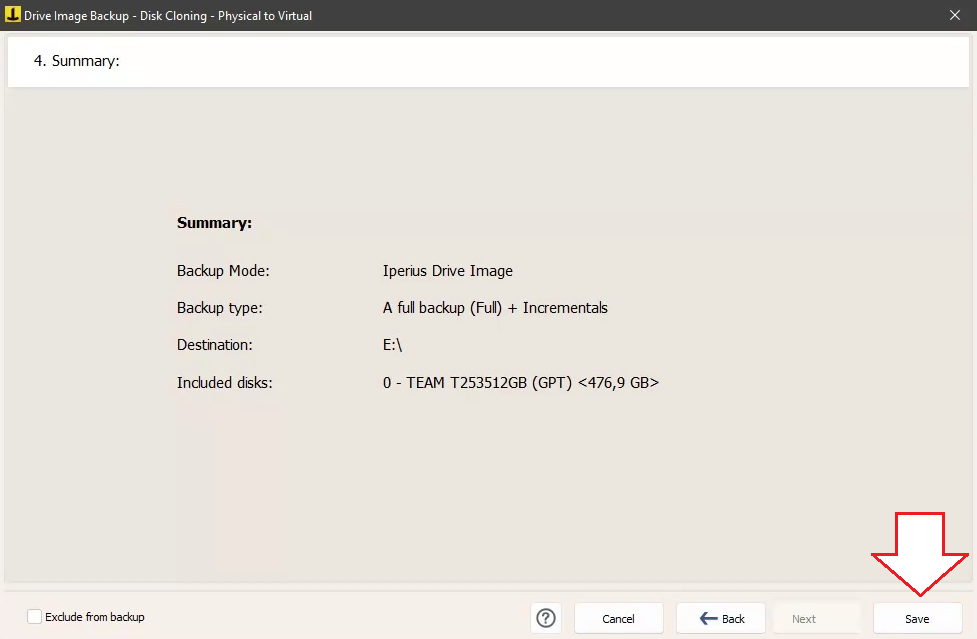
Click on “Save” to store the settings of this backup, and thus have it in the list of items, as shown below:
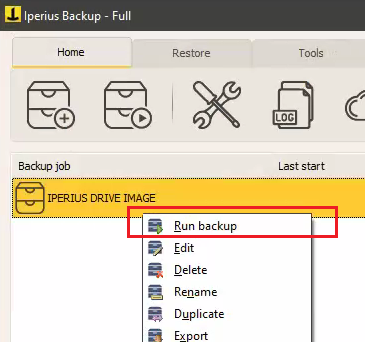
Click on the “Next” button to proceed. In addition to the panel for any additional destinations, we will have the option to specify a schedule (to automatically run the backup on specified days and times), email notifications (to be notified of the backup’s success), or the execution of other processes (scripts, services, programs, etc.). For this type of backup, no other options need to be specified. We can then immediately save the backup operation and run the drive image:
At the end of the backup, we will have a .VHD or .VHDX file for each disk we selected in the destination folder.
These files can be easily explored to recover individual files (except for the backup type “A full backup (Full) + Incremental” and “A full backup (Full) + Differential”), or fully restored, even on different hardware, using an Iperius boot disk and the Iperius Recovery Environment®. Finally, it will be possible to perform an “instant-restore” of the machine, being able to immediately start the saved system as a Hyper-V virtual machine using the VHD/VHDX file just created as the disk.
NB: Iperius Backup automatically assigns new GUIDs to the disk and its partitions, to avoid issues due to possible duplication of GUIDs when the image is mounted on the same system where it was created.
Restore:
To see how to create an Iperius recovery disk, refer to the related tutorial: https://www.iperiusbackup.net/en/create-recovery-drive-usb-recovery-disc-iso-iperius/
To see how to perform a bare-metal restore of an Iperius image backup, using Iperius Recovery Environment®, refer to the related tutorial: https://www.iperiusbackup.net/en/restore-drive-image-backup-system-recovery-with-iperius/
To see how to perform a single file restore from an Iperius Drive Image backup, follow this tutorial: https://www.iperiusbackup.net/en/how-to-mount-vhd-vhdx-extract-individual-files-from-drive-image-and-hyper-v-backups/
Backup is stuck at 0kbs / 0% 0 what to do to resolve?
Hi,
sorry for the delay in replying you.
For technical support open a ticket on https://support.iperius.net