https://www.iperiusbackup.com/cms/iperius-backup-tutorials.aspx
Exchange Online, an essential part of the Office 365 suite, is one of the most widely used email services in the world for managing company messaging via email.
In addition to its primary function, it also allows the management of calendars and address books, which can be shared without the need for additional applications.
The Advanced 365 version of Iperius Backup allows you to perform a complete, incremental, and differential backup and restore of Exchange Online for your organization (and also of local Exchange Servers), meeting all your needs and enabling you to keep your mailboxes safe by performing periodic backups, which can then be restored if needed in case of issues.
With this feature, Iperius enables granular backup of your emails, calendar events and contacts respectively into .pst, .eml, .ics, .vcf files, applicable to individual mailboxes or groups, covering all the mailboxes in your organization.
See also: Backup of Exchange Server (on-premise) and export of mailboxes to .PST files with Iperius Backup
With the purchase of a single license and installation, you can perform backups (and restores) of unlimited mailboxes of your Microsoft Exchange server (both Exchange Online on Office 365 and your local Exchange Server), enjoying all future updates for free.
In this tutorial, we will see how to back up one or more Exchange Online mailboxes belonging to an Office 365 organization.
1) Create an Exchange backup
First, create a new backup operation and add a backup item of the Exchange type:
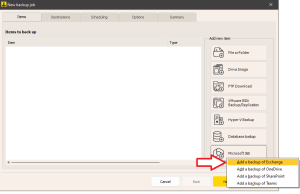
At this point, a configuration window like the one below will open, where you will set the necessary parameters for the mailbox backup:
2) Configuring the Exchange account
You will now add your Exchange Online account to Iperius Backup so that the program can connect to the Office 365 organization to list and export the mailboxes.
Note: It is necessary to configure an account for each Office 365 organization you want to connect to.
To add an account, click on the icon highlighted in the image below:
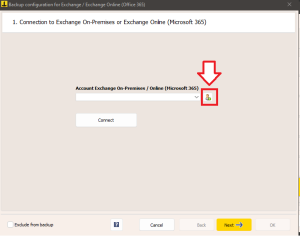
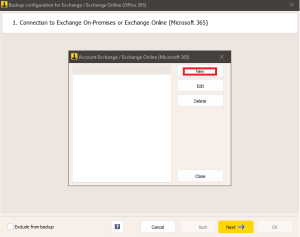
Now, the Exchange account management window will open, showing the accounts created in Iperius. To create a new one, simply click the “New” button (see image below).
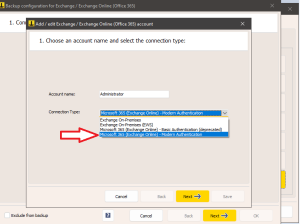
At this point, a new window will appear, where you need to enter the necessary information to connect to your Exchange organization.
First, set the “Account name” and “Connection Type” of you account, selecting “Office 365 (Exchange Online) – Modern Authentication” as shown in the image below:
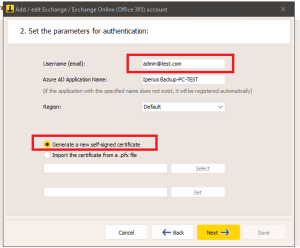
Now, enter the username (email) of your account and a new (or existing) “Azure AD Application name“.
Select the Region of your organization and click “Generate a new self-signed certificate“. If you already have a certificate, you can import it using File Explorer.
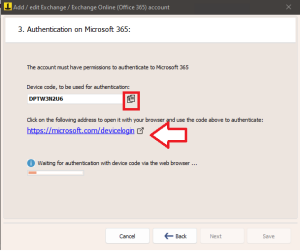
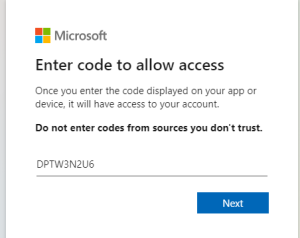
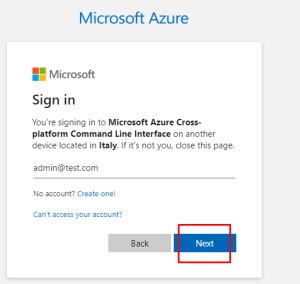
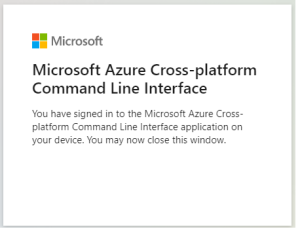
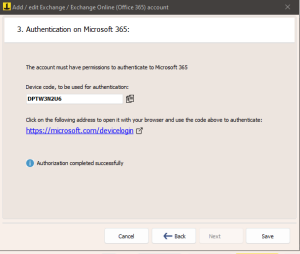
To complete Modern Authentication, you need to copy and paste the “Device Code” on the Microsoft 365 login page, as described in the following steps:
Now can close the browser and save the Exchange Online account configuration.
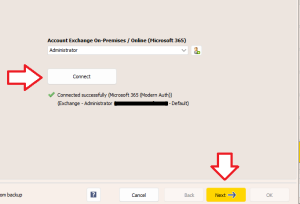
Finally, click the “Connect” button. If the connection is successful, a positive message will appear as shown in the image below.
Once the configuration is complete, proceed to select the mailboxes to export.
3) Selecting the mailboxes
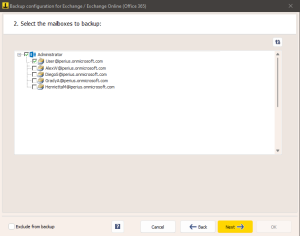
After selecting you account from the dropdown menu, click the “Next” button to list the mailboxes.
In a few seconds, the panel will be populated with the mailboxes present in the Outlook 365 organization:
At this point, as highlighted in the figure above, simply check the mailboxes you want to back up and click “Next“.
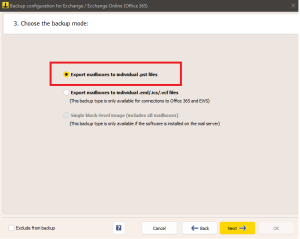
Here you can choose the type of backup you want to perform. By default, the “Export mailboxes to individual .pst file” option is selected, but you can also choose to export .eml files or perform a block-level backup (only if Iperius is installed on the Exchange server).
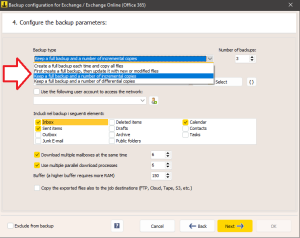
In the next step, you can set the local or network backup destination (and optionally the corresponding network credentials) and the type of backup to perform.
Iperius Backup allows Full, incremental, or differential backups of Exchange Online mailboxes, starting from version 8.3.0.
For example, select incremental backup with 3 copies, where Iperius creates a full backup first and saves only the differences from the previous backup in the next 3 incremental folders (the differential backup saves the differences relative to the Full backup):
You can also select the items to include in the backup (Inbox, Sent Items, Archives, Public Folders, Calendar, etc.).
Note: If you decide to add additional destinations to your backup operation to copy the exported mailbox files, simply check the box “Copy the exported files also to the backup operation destinations”.
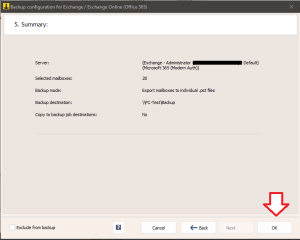
The final step is the Summary of the settings just configured.
If the configuration is as desired, just click the “Ok” button to return to the general settings of the backup operation.
4) Setting additional destinations
Once the Exchange backup item is configured, click the “Next” button to proceed with creating the job (see image below).
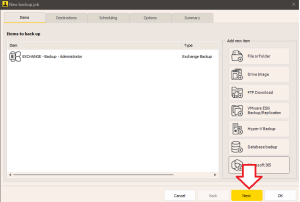
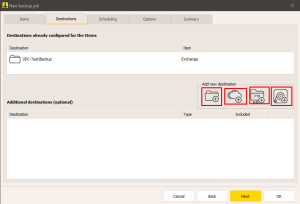
The next panel, “Destinations“, allows us to select one or more additional destinations for the backup operation, choosing between folders, tape, FTP, or cloud (see next image). Of course, they will only be active if, within the Exchange backup item, the option “Copy the exported files also to the backup operation destinations” has been checked.
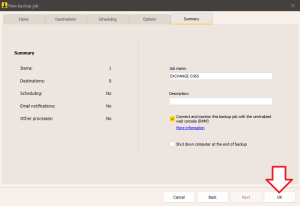
To finish configuring the job, continue with the settings using the “Next” button (going forward with the configuration, you can set further options like scheduling and email notification of the backup outcome) until you reach the final panel, “Summary“. Here, you can choose a name for your backup operation and add any notes. Once set, click the “Ok” button to confirm.
5) Starting the backup operation
At this point, the newly created job will be listed in the Iperius backup operations. To start it, simply select it and click the “Run” button, as highlighted in the image below:

The job will start and export the selected mailboxes to the chosen destinations.

I need to backup all Exchange Online (365) mailboxes to PST.
I set up an Office365 account correctly. (the whole proces creating an Azure application etc.) When I try to backup Exchange Online it shows ‘Connecting with username@domain’…. after a while backup fails. What can be the problem?
Hi
for this kind of problem please open a support ticket from here https://www.iperiusbackup.com/contact.aspx